
Policy-based routing over VPN with Ubiquiti EdgeRouter
With the Ubiquiti Edgerouter, you can use policy-based routing to send specific devices’ traffic over a VPN.
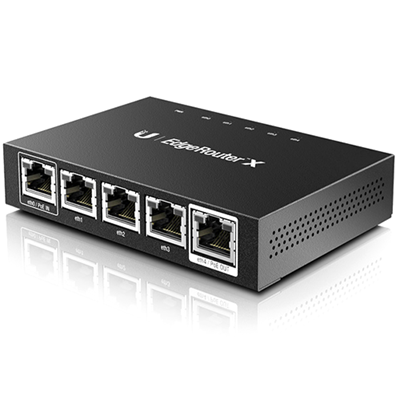
I’ve got a Ubiquiti EdgeRouter X as my home router. I opted for this over a typical consumer-grade router since I’m the kind of person that likes to open up a shell and start hacking around to do fun things that you can’t do with consumer-oriented hardware. It’s a steal at twice the price. Check it out on Amazon.
A perfect example is using policies to route specific devices through a persistent VPN connection. I’ve found some content blocked where I live and I don’t like that. Also, for some devices I want a higher level of privacy and security, and many devices either can’t VPN on their own (TVs, streaming boxes) or can’t guarantee that all traffic will be routed over the VPN. With the router these are easily solved!
Step 1: Get a VPN service
For my VPN service I use VyprVPN. I’ve been using them for over ten years from dozens of countries and never had a problem and always had great speeds. With the link there you’ll get a free month to try it out!
Step 2: Prepare OpenVPN configuration
Download the OpenVPN configuration files and copy them to your EdgeRouter; I used scp and put them in /config/auth/vyprvpn. You need to edit these files before you can use them. In this example, I’m using Switzerland.ovpn.
Store your username and password
Create a file /config/auth/vyprvpn/auth.txt where one line is your VyprVPN username and the next is your password:
[email protected]
p@ssw0rd
Now, I’ll edit Switzerland.ovpn. Find the line that says auth-user-pass and add the file path after it:
auth-user-pass /config/auth/vyprvpn/auth.txt
Disable default routes
By default when you enable one of these VPNs all of your network traffic would be routed through the VPN. That’s not what we want here. Edit Switzerland.ovpn again and add route-nopull on any line to ignore routes provided by the VPN server.
Step 3: Setup the VPN
SSH into your router and enter configuration mode with the command configure.
This part is easy! Just create an openvpn interface with the config file, commit the config, and it should come right up.
$ set interfaces openvpn vtun0 config-file /config/auth/vyprvpn/Switzerland.ovpn
$ set interfaces openvpn vtun0 description "VPN to Switzerland"
$ commit
$ ip addr show vtun0
That last command should give you a line with inet 10.3.37.123/24 brd ... which indicates the VPN is up and you got an IP! Sweet!
Step 4: Create a group for devices that will use the VPN
This step is optional, but I like to create a firewall group for devices that will use the VPN. That way I can easily add or remove devices without touching other config.
It’s a good idea to create a DHCP reservation for the devices you want to route or have them use static addresses, otherwise your config won’t apply when they get a new random address. In this example I’ve already given my device the static IP 10.65.49.21
$ set firewall group address-group vpn_ch
$ set firewall group address-group vpn_ch address 10.65.49.21
Step 5: Create a static route and firewall rule
In this example, I’m calling my firewall rule detour but you can call it whatever you like.
The table and rule numbers are also arbitrary but to ensure they’re not in use, use show protocols and show firewall.
$ set protocols static table 1 interface-route 0.0.0.0/0 next-hop-interface vtun0

$ set firewall modify detour rule 10 description "Auto-VPN to Switzerland"
$ set firewall modify detour rule 10 source group address-group vpn_ch
$ set firewall modify detour rule 10 modify table 1
The next thing we have to do is set which physical interface this applies to. You could have a specific port on your router be VPN’d (how cool is that!) but in my case I want any LAN port, so I’m using the whole switch device:
$ set interfaces switch switch0 firewall in modify detour
Step 6: NAT
Traffic won’t flow without a NAT rule:
$ set service nat rule 5010 description "masquerade for vtun0"
$ set service nat rule 5010 outbound-interface vtun0
$ set service nat rule 5010 type masquerade
Step 7: Commit, save test
Now just run commit to apply your configuration changes and then save to persist them to internal storage.
$ commit
$ save
If your device has curl, here’s a great way to test that it’s working:
$ curl -s http://ifconfig.co/json | jq
{
  "ip": "128.90.23.241",
  "ip_decimal": 2153388017,
  "country": "Switzerland",
  "country_iso": "CH",
  "city": "Zurich",
  "hostname": "undefined.hostname.localhost"
}
Tada! We’re in Switzerland! Let’s get some chocolate.
More?
If you want more VPNs just keep repeating the process, increase the table and rule values. I’ve got three going for various things. Depending on how privacy rules work out and where I live, I may even invert the process so all of my traffic goes over the VPN except for devices like Xbox where the latency would foul-up my Overwatch.
Performance
This is the downside. OpenVPN is pretty slow and maxes out at about 10 Mbit on this hardware. The EdgeRouter supports hardware offloading for IPSec, so my next task is to set that up instead of OpenVPN. For now, this works for what I need.