
Sun Ultra 24 - Reborn
The Sun Ultra 24 is objectively one of the most beautiful enterprise workstations ever created. I picked one up last year but its hardware is rather dated and needs an upgrade to keep it as a daily driver. Let’s do it.
Background
The Sun Ultra 24 was one of the last workstations from Sun Microsystems. In their final years of making workstations they started offering x86-based systems with AMD Opteron or Intel Core 2 64-bit CPUs. Compared to UltraSPARC-based hardware of the past, these systems were pretty much bog-standard PCs. ATX* motherboards, SATA drives, DVI, DisplayPort, etc.
This made the case exceptionally easy to use as a build base. No Dremel or CNC machine required.
* Not the Ultra 40
Hardware
I didn’t want to build a whole new system from scratch. I’ve had my gaming PC in a DAN A4 mini-ITX case. It’s cool being able to put your computer in your backpack, but the thermal situation isn’t great and making any modifications to the system means a complete disassembly.
I stripped that system for parts and got a few new ones.
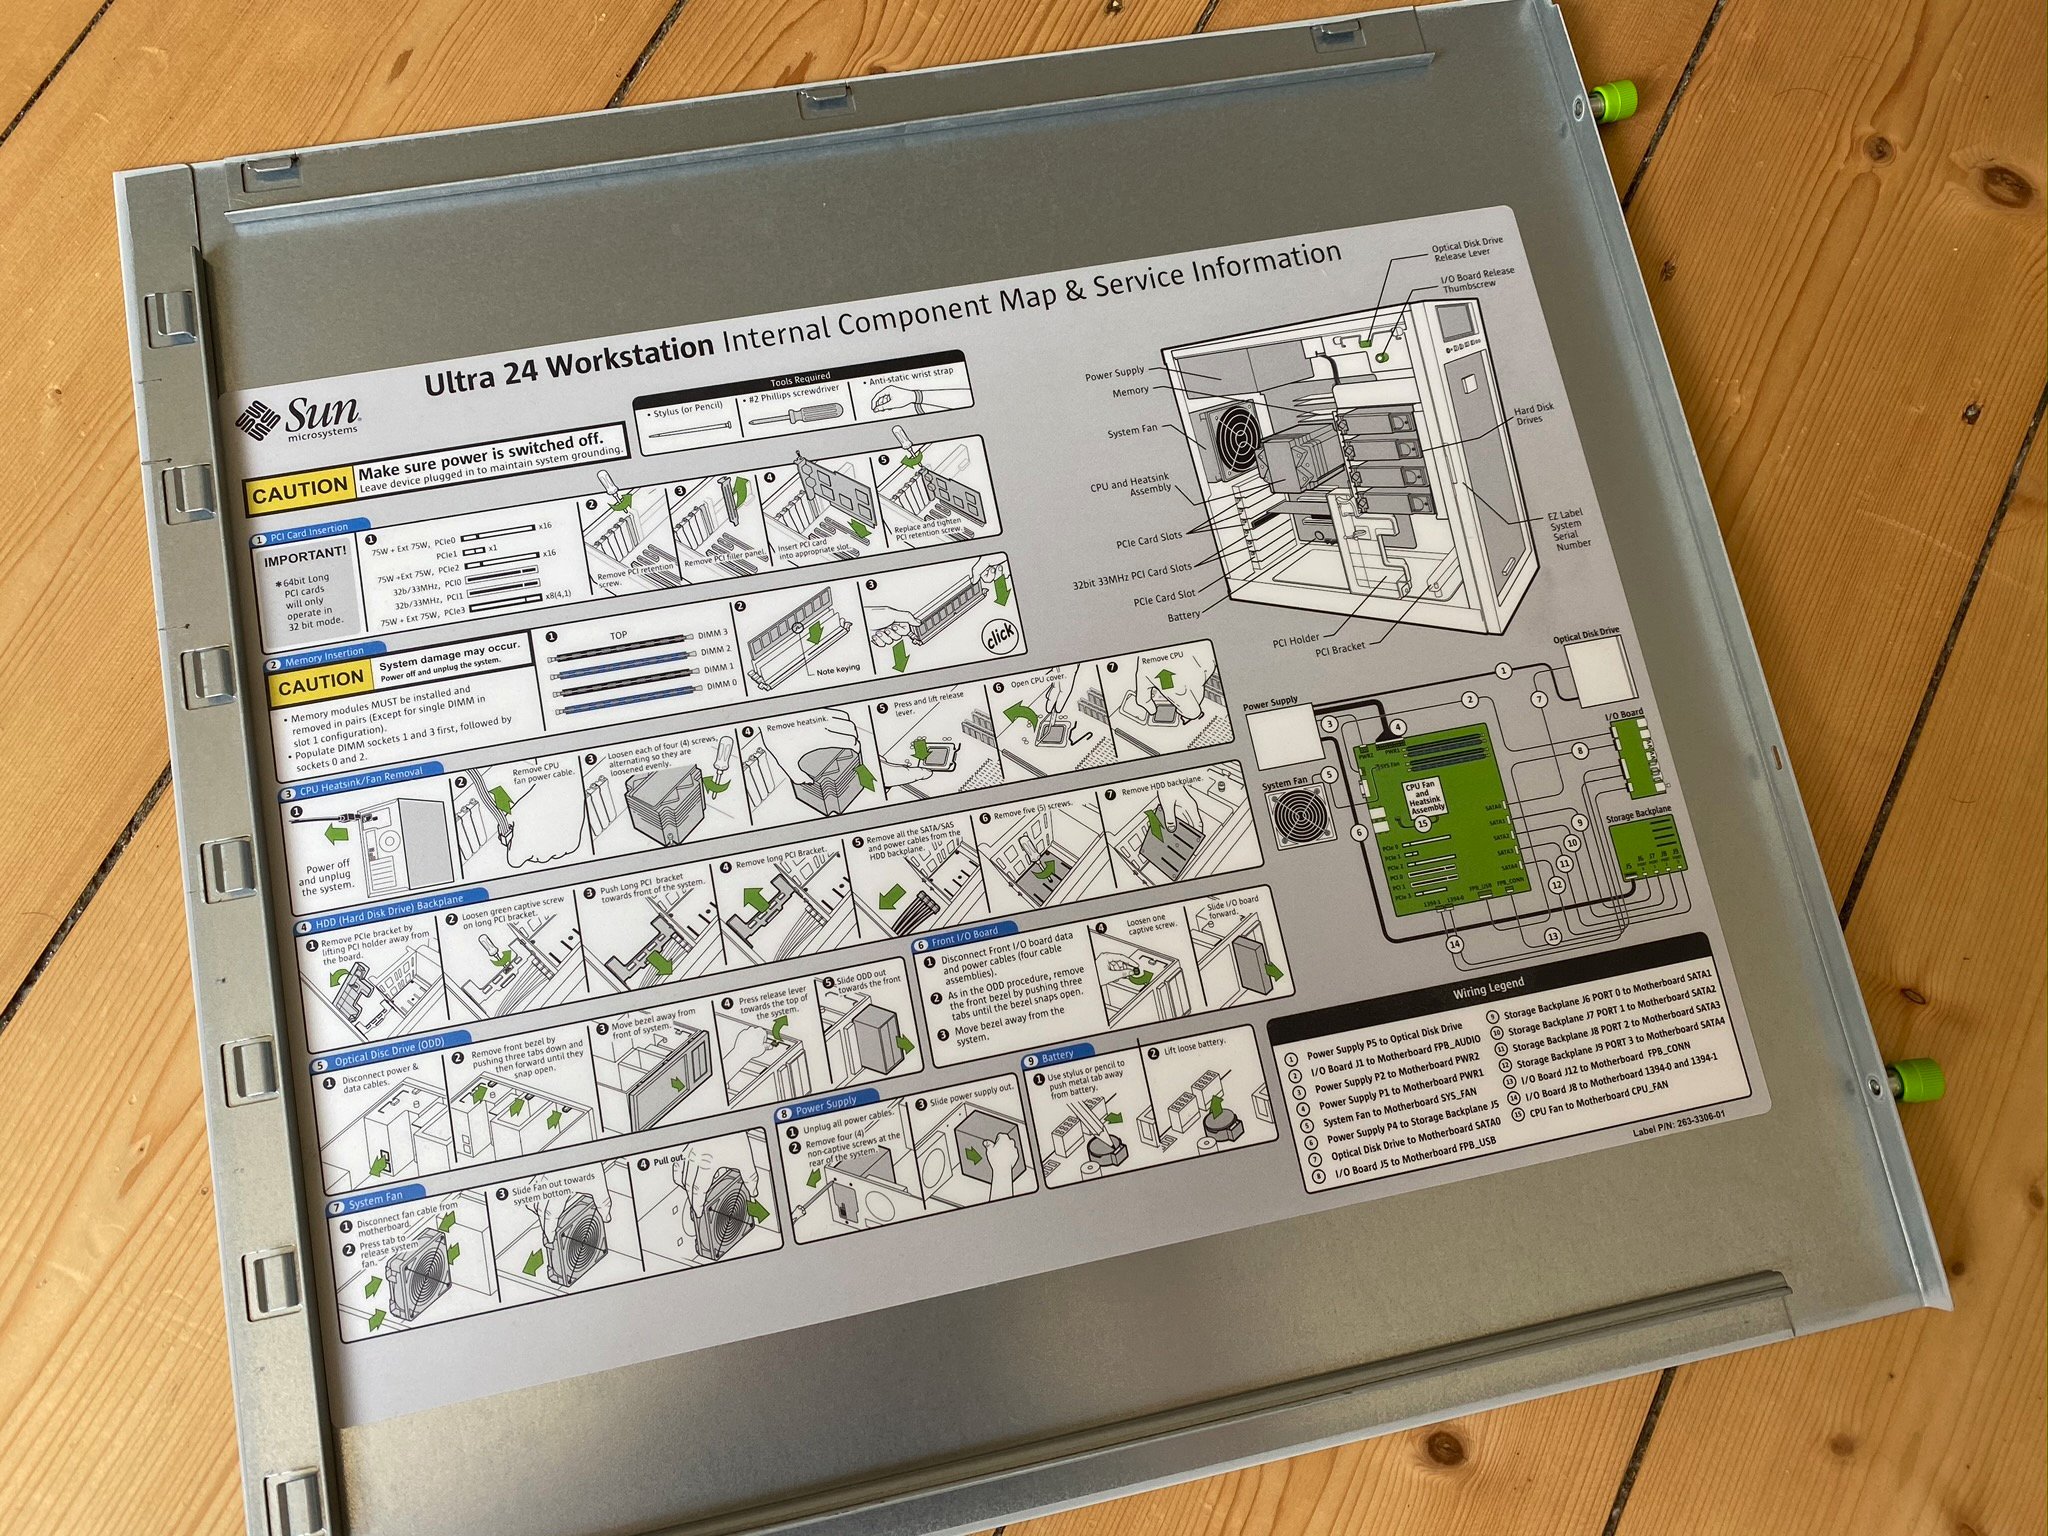
Inside door panel. This is typical of Sun to have a detailed diagram easily accessible.
Motherboard
Shopping for motherboards these days pretty much leaves you two options: boards for gamers and boards for servers. Most gamer boards have 2 PCI-E 16x slots and then some 1x slots. Aside from a graphics card, I want to install my Mellanox ConnectX-3 NIC for 10 GbE and a SCSI controller, both of which are PCI-E 4x. Aside from that, I do not want RGB, overclocking, or my board to be named something like Republic of Gamers Fatal1ty Xtreme Gamer Edition.
My requirements:
- Support my existing CPU, an Intel Core i5-8400 (Coffee Lake)
- At least one PCI-E 4x or 8x slot in addition to the standard 2 16x
- Dual M.2 NVMe slots
- SATA hotplug support
Nice to have:
- Onboard USB-C
- COM port headers
- No RGB or other gamer-targetted aesthetics.
- PS/2 port for hooking up retro keyboards
I found the perfect board. The Gigabyte CU246-WU4. This is marketed as a workstation board, which is perfect. It ticks all the boxes above and then some.
It maintains some of the cool features from Sun Ultra 24 board that are great for debugging and eventually for use as a test bench system:
- 32-bit PCI slot
- Onboard buttons for Power and Reset
- Onboard USB-A port, perfect for booting FreeNAS off a USB stick
- Segment display of boot status and diagnostic codes
- Serial port console redirect
It also has support for Xeon CPUs which would be a nice upgrade in the future.
CPU and RAM
Nothing remarkable here. I took the Intel Core i5-8400 (6 core 2.8 GHz base) and 2x8GB sticks of DDR4 RAM out of my gaming PC. I’ll add 2x16GB in the near future to support my prolific use of virtual machines and running Slack. The board supports up to 128 GB.
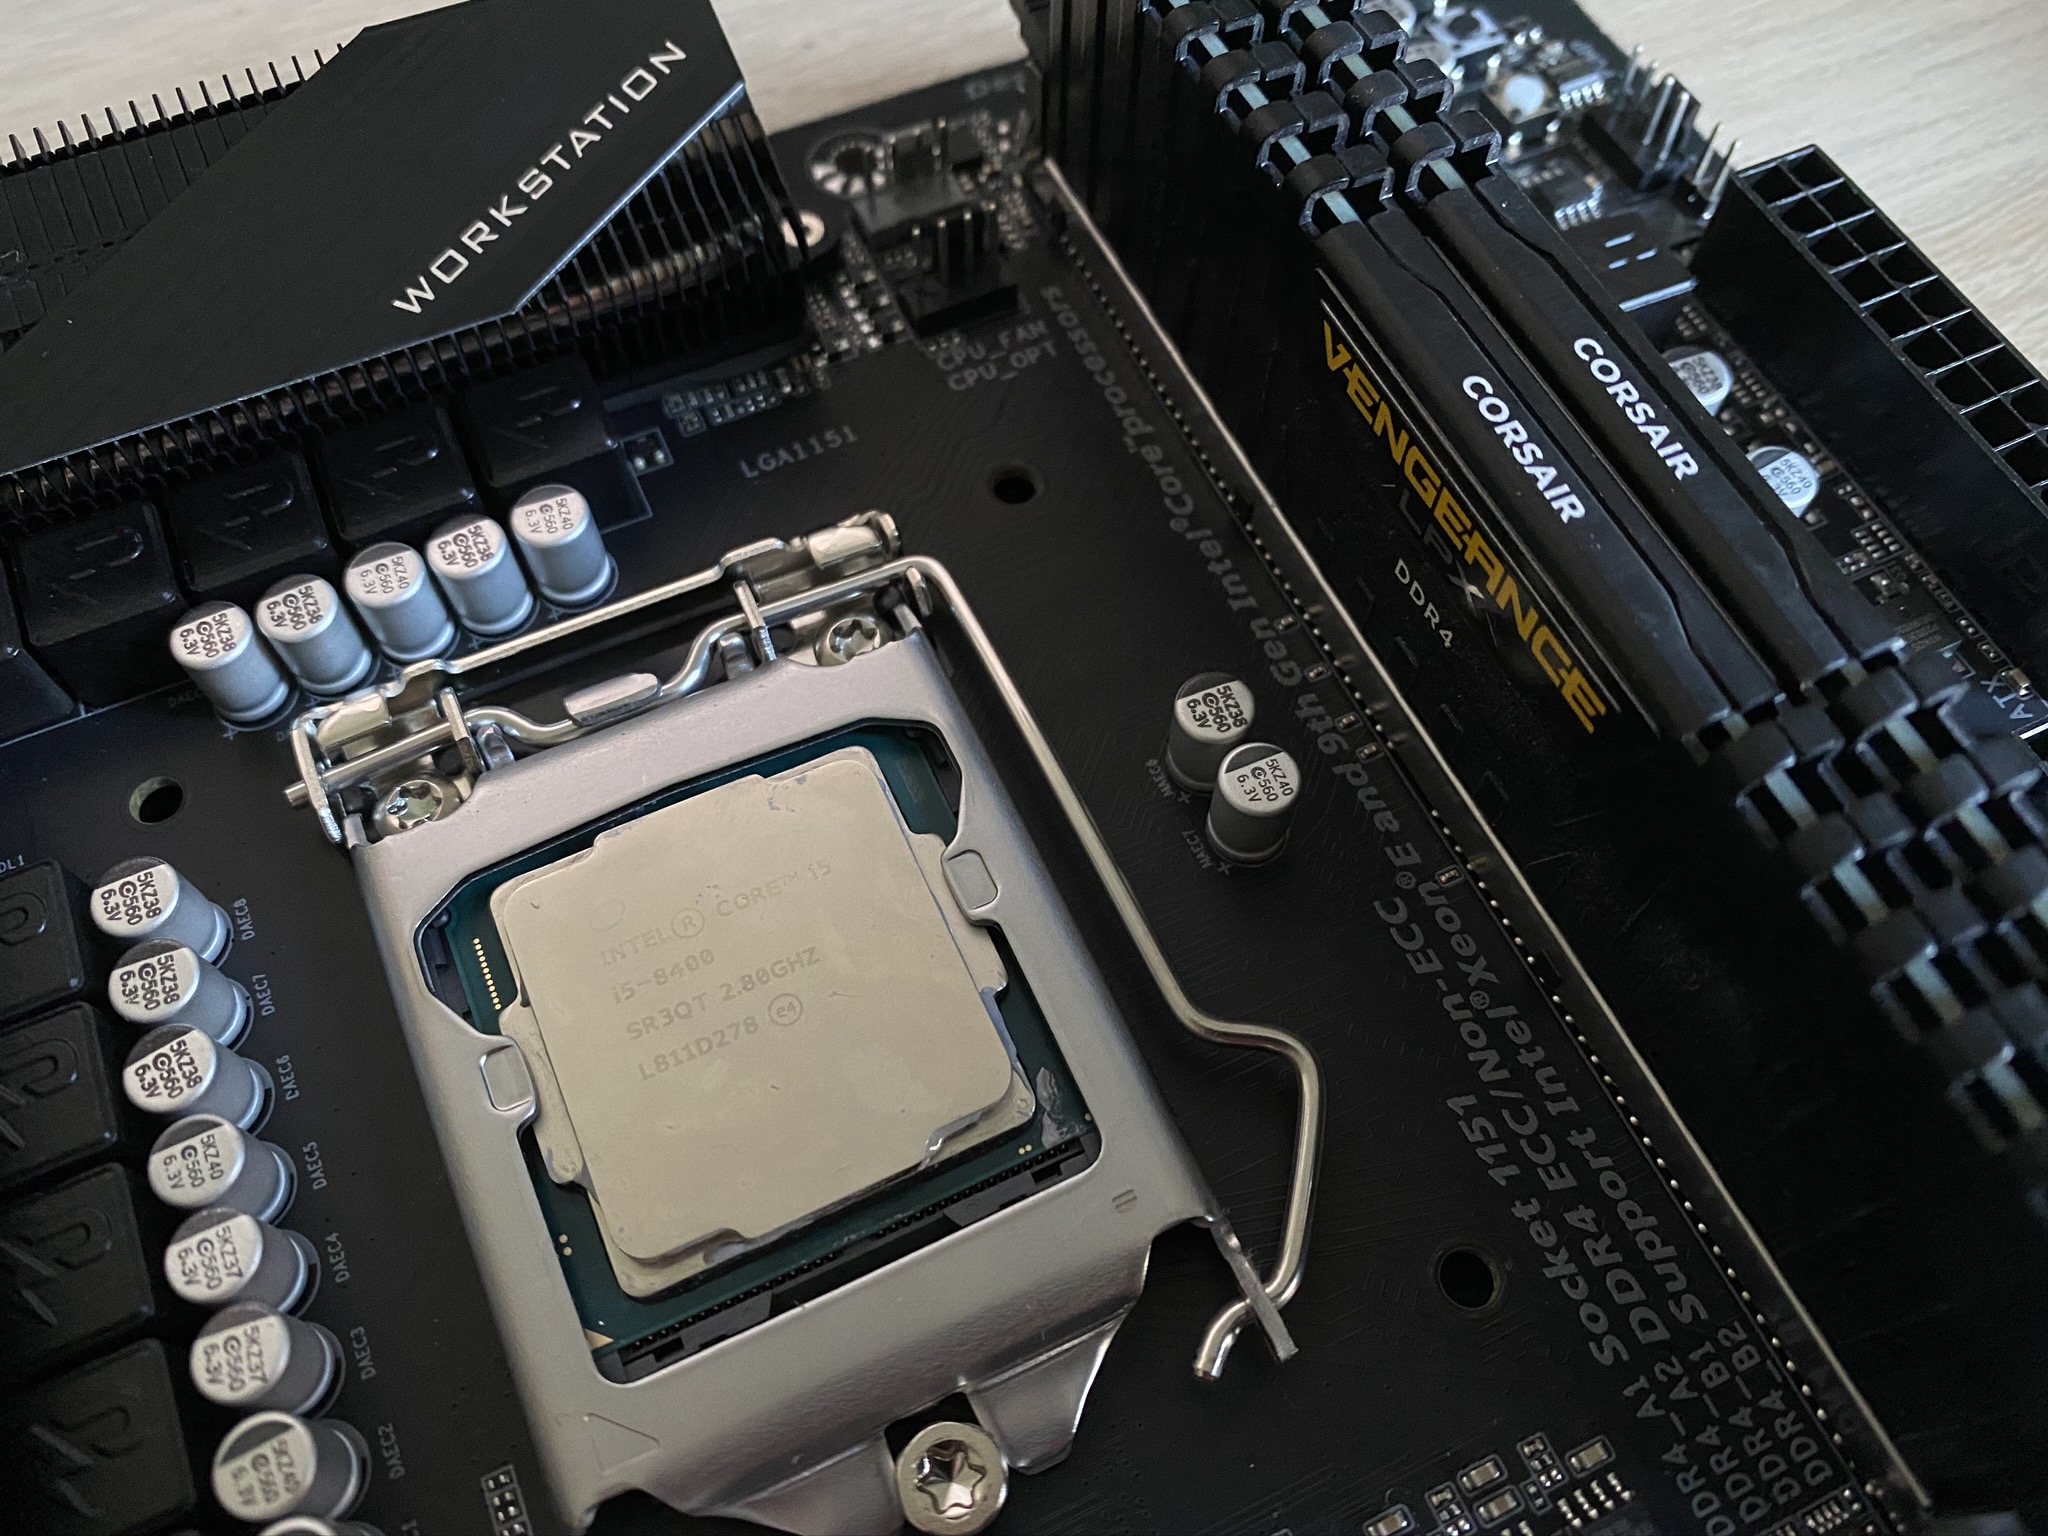
CPU and RAM installed. I initially put the RAM in the wrong slots when I took this pic; the labels were misleading. Fixed it soon after.
Graphics
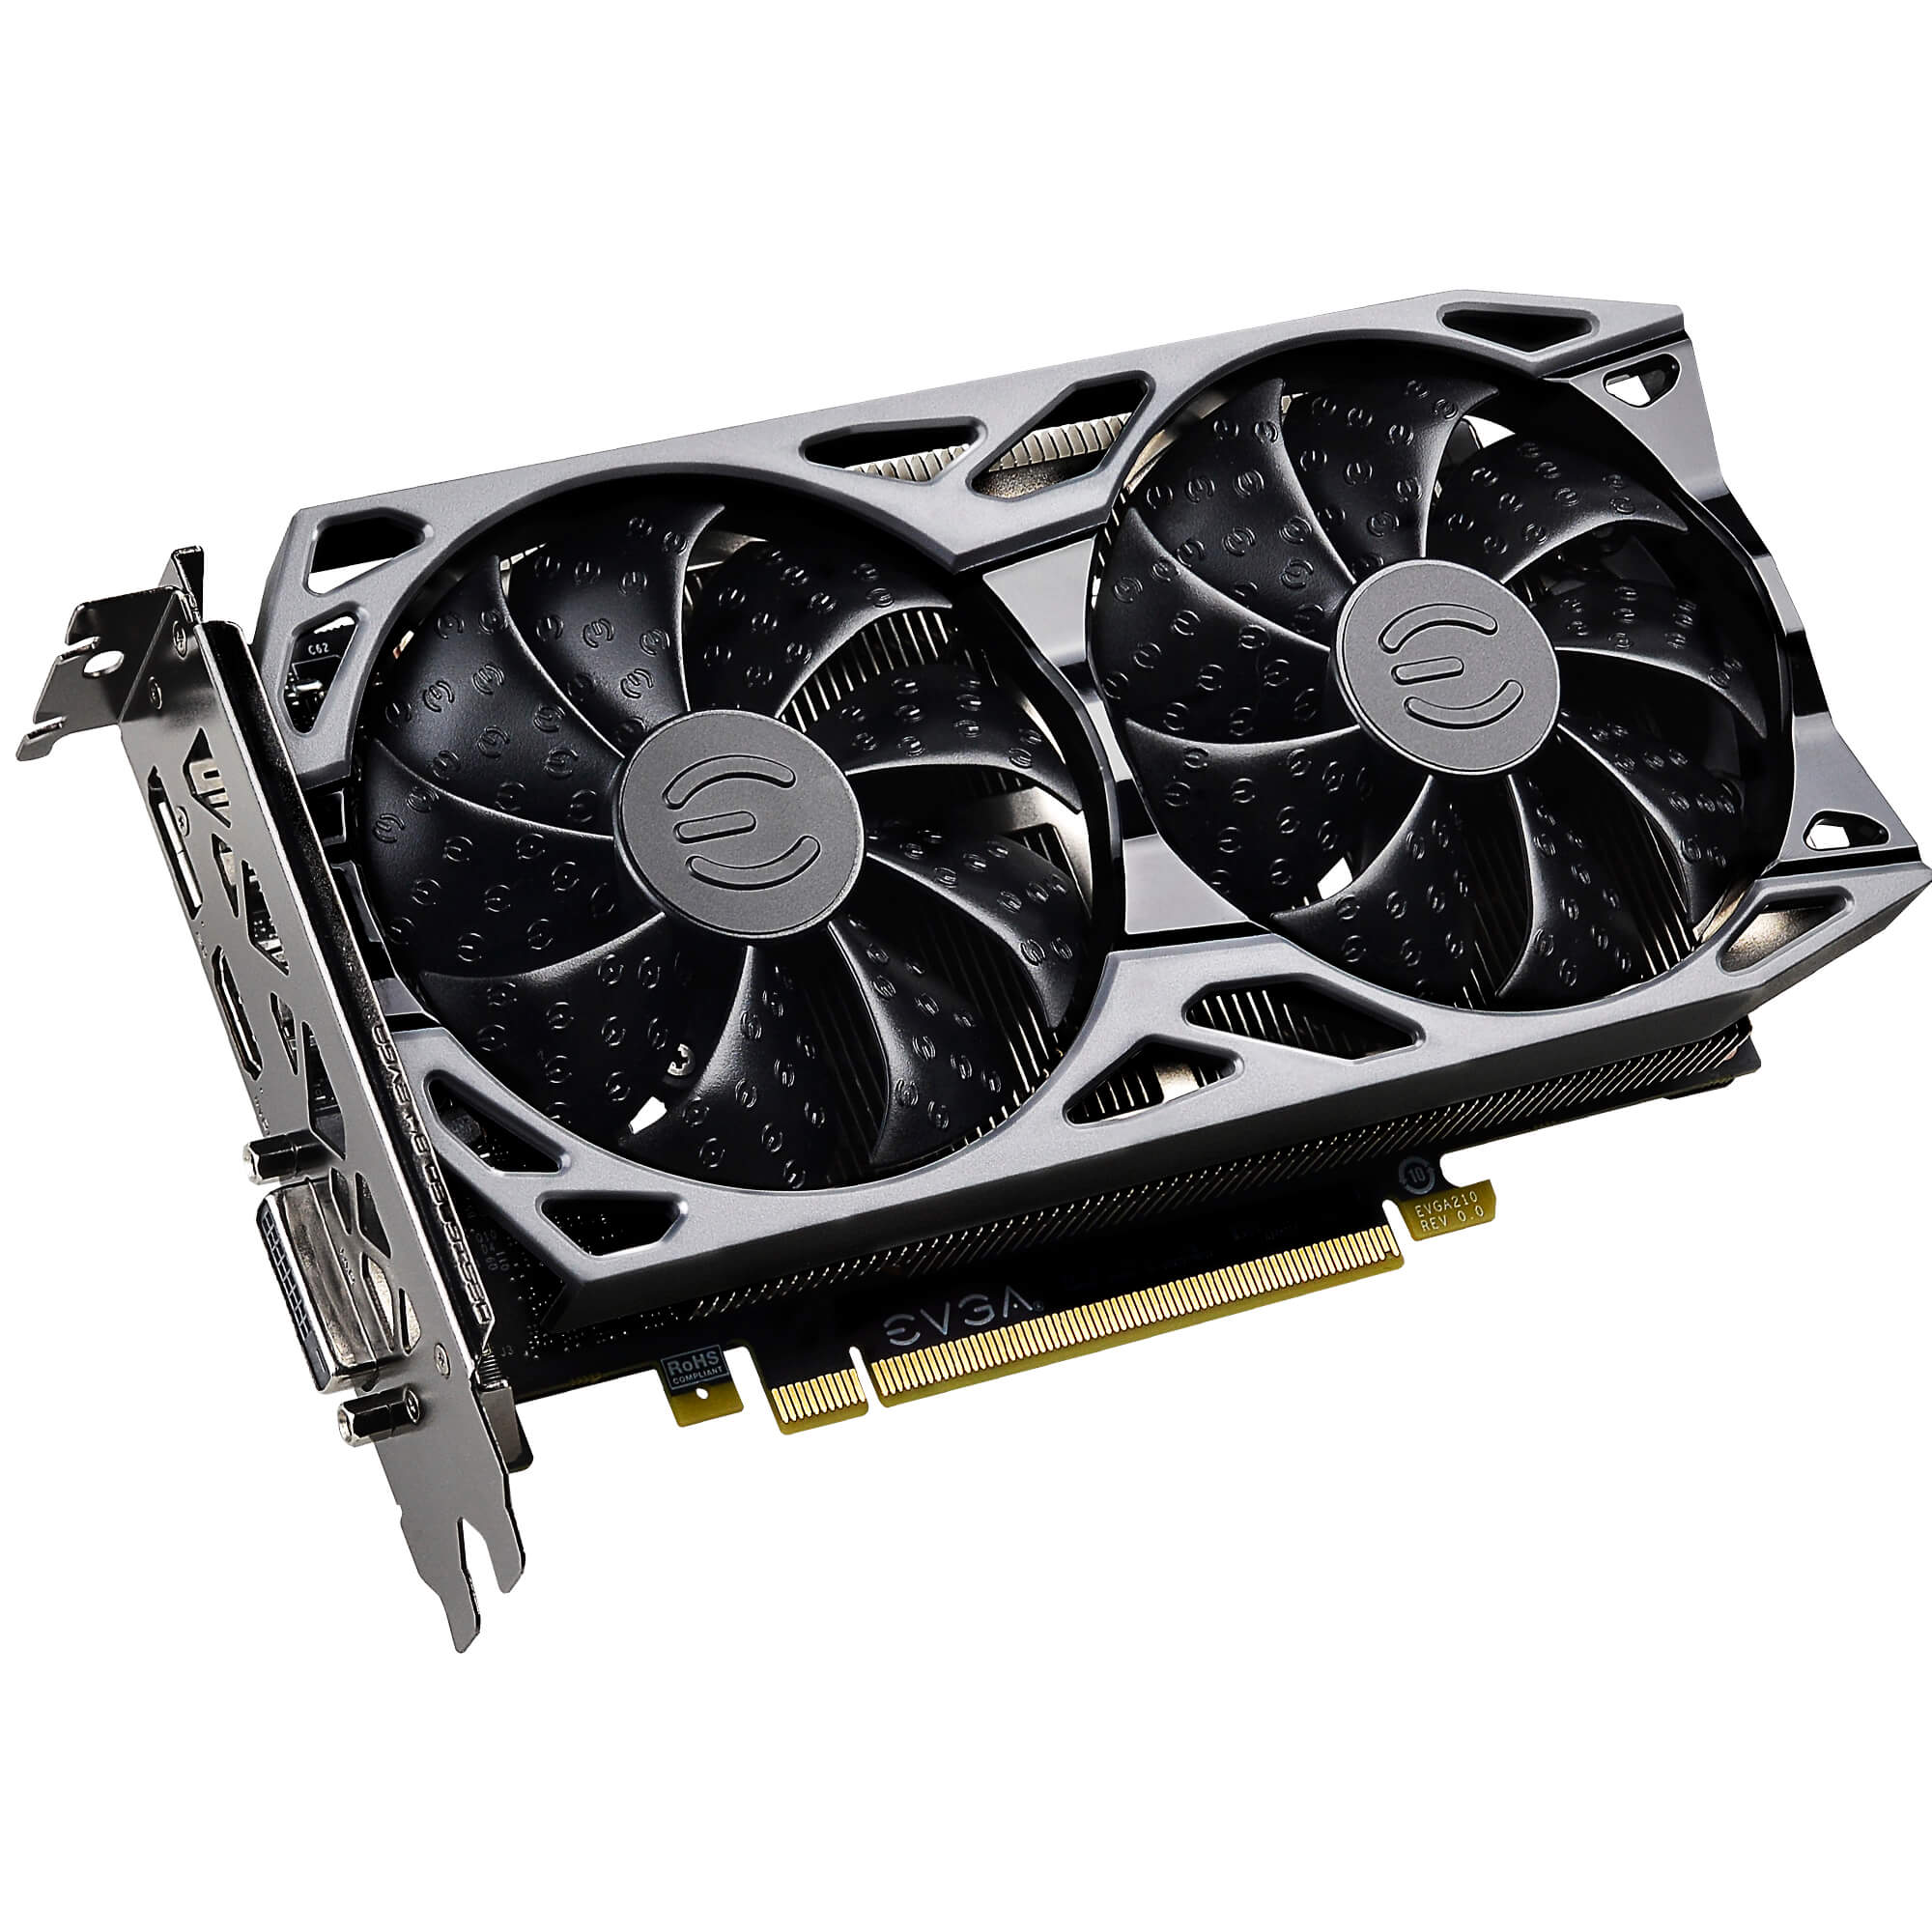
The system board has dual DisplayPort outputs which is unique and appreciated. I still do some gaming though, so I moved my GPU into this system: EVGA 1660 Ti SC. It’s a good GPU for the games I play. My only complaint about it is the fan controller. It has no hysteresis which means you can hear the fan just clicking on and off at idle, and sometimes it has this pulsating sound as the fan revs up and down.
Cooling
CPU
The low-profile cooler from the mini-ITX case was a non-starter. I wanted something slightly over-dimensioned so it would be quiet. I bought a Noctua NH-U14S but I went too far with the over-dimensioned idea. It physically fit in the case, but it obstructed the top PCI-E slot. It may have been possible to squeeze a GPU in there but it would have been rubbing up against the cooler. Not good.
I loved the look of the be quiet! Shadow Rock 3 so I ordered one, but Amazon sent me the wrong cooler. I already had the system disassembled and ready for the new cooler so I just installed the be quiet! Pure Rock Slim I’ve had since the earliest incarnation of this PC. It’s really fine for this CPU which has a max TDP of 65W.
Exhaust
The Ultra 24 had one 120mm exhaust fan. I would have kept it, but on this board it constantly ran at full blast. Despite having 4 wires maybe it’s not a proper PWM fan? Another Sun Ultra 24 owner, Nathan Vaughn, reported the same problem with his build.
The rear fan mount is one of those brackets with clips attached to the case rather than just having holes for screws. Any 120mm fan that uses the standard boxy style will snap in just fine. (An example of a fan that doesn’t work: be quiet! Silent Wings 3)
Noctua has new line of fans called the Redux which are a bit less expensive, but more importantly, have a grey colour scheme! Perfect to match this system. For the rear I got the Noctua NF-S12B redux-1200 PWM. This fan is optimised for moving large volumes of air versus having high static pressure that’d you would find in the S12P.
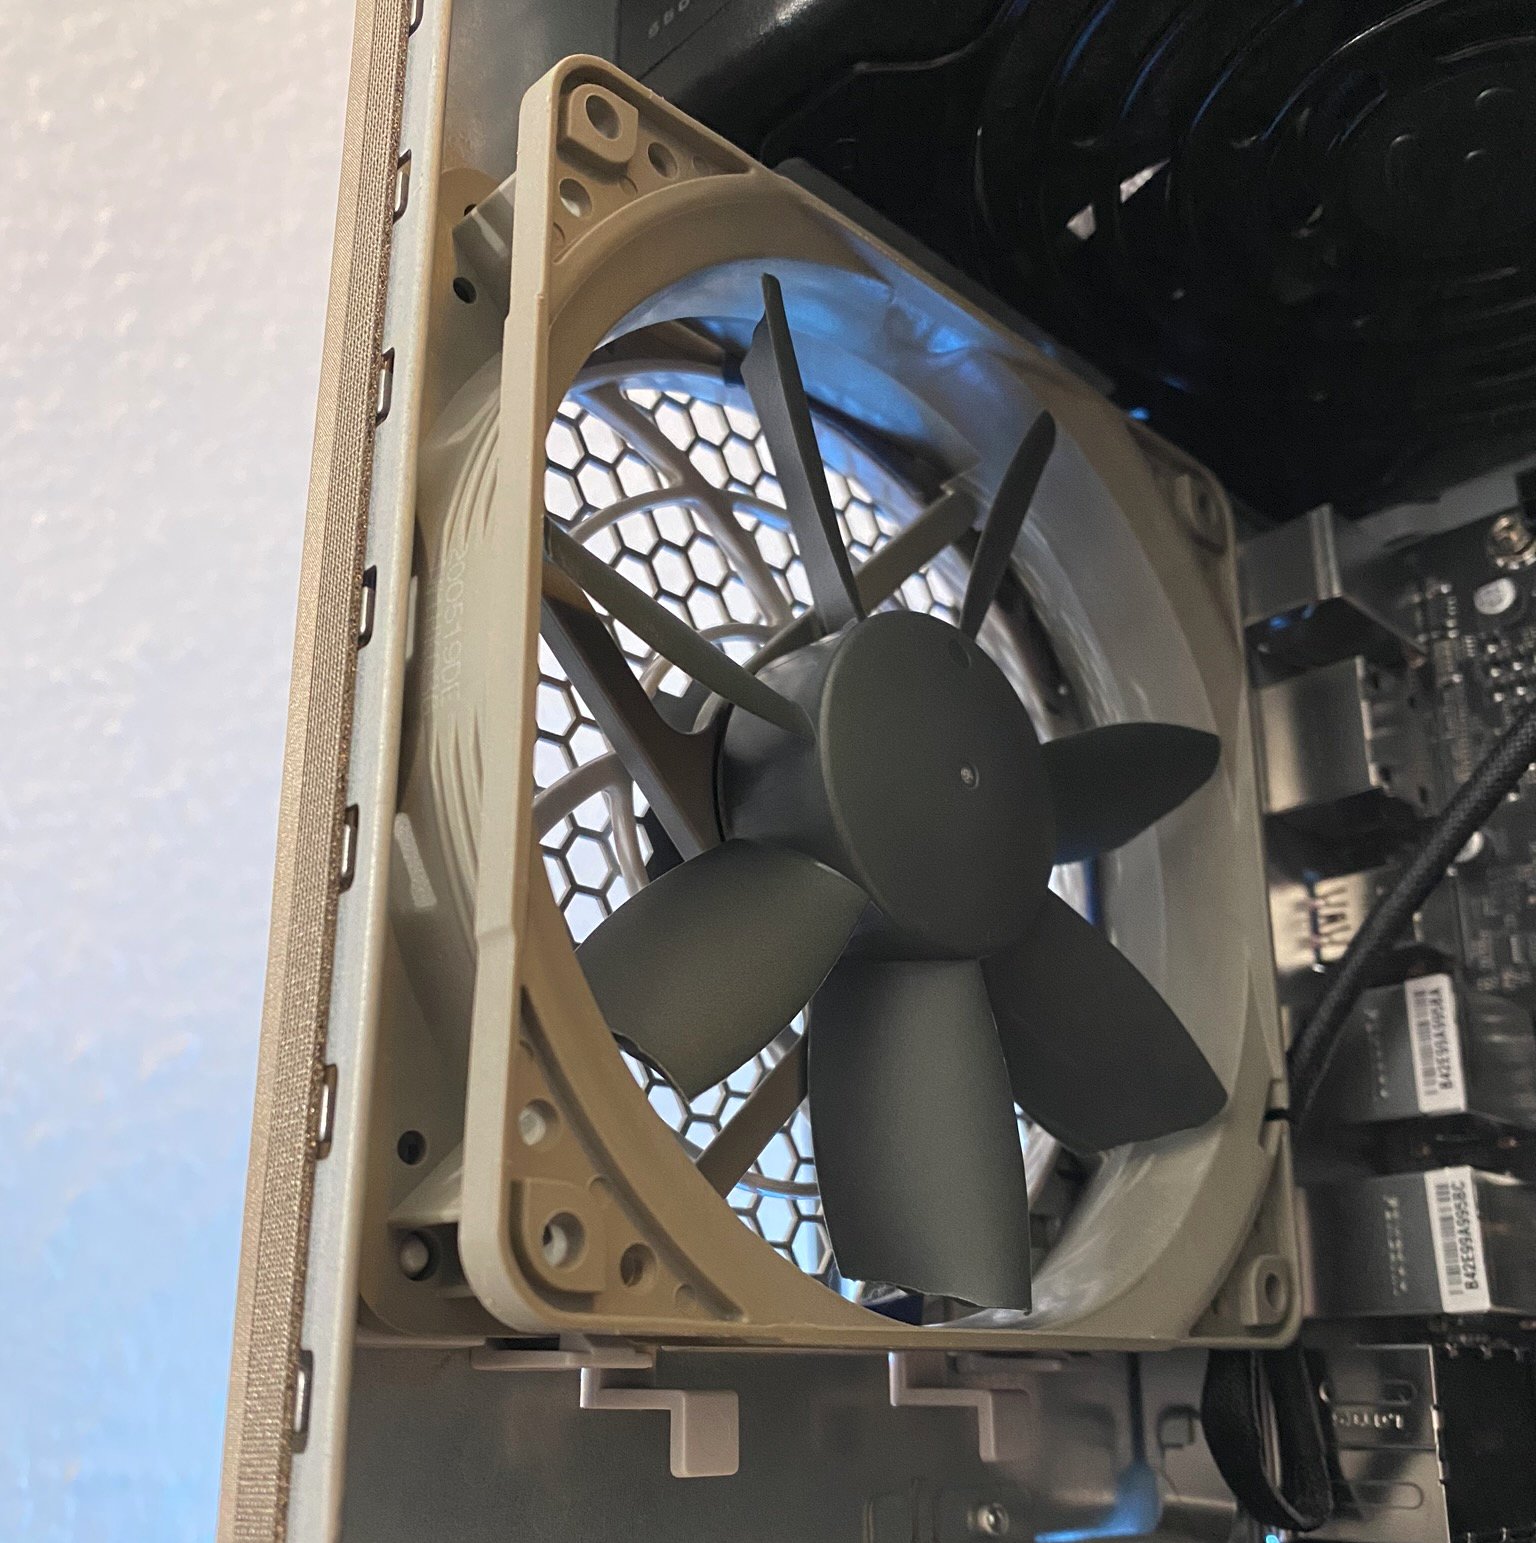
NF-S12B installed. Notice the clips holding the fan in there. You need a boxy fan so the clip mount works.
Intake
The system didn’t come with an intake fan. In the front it has a space for a 92mm fan and what looks like holes for those plug mounts, probably for another plastic fan mount bracket which I didn’t have. I picked up a Noctua NF-B9 redux-1600 PWM for this slot. I took some washers, “painted” them black with a permanent marker, and job done! If dust becomes a problem I’ll put a screen over it.
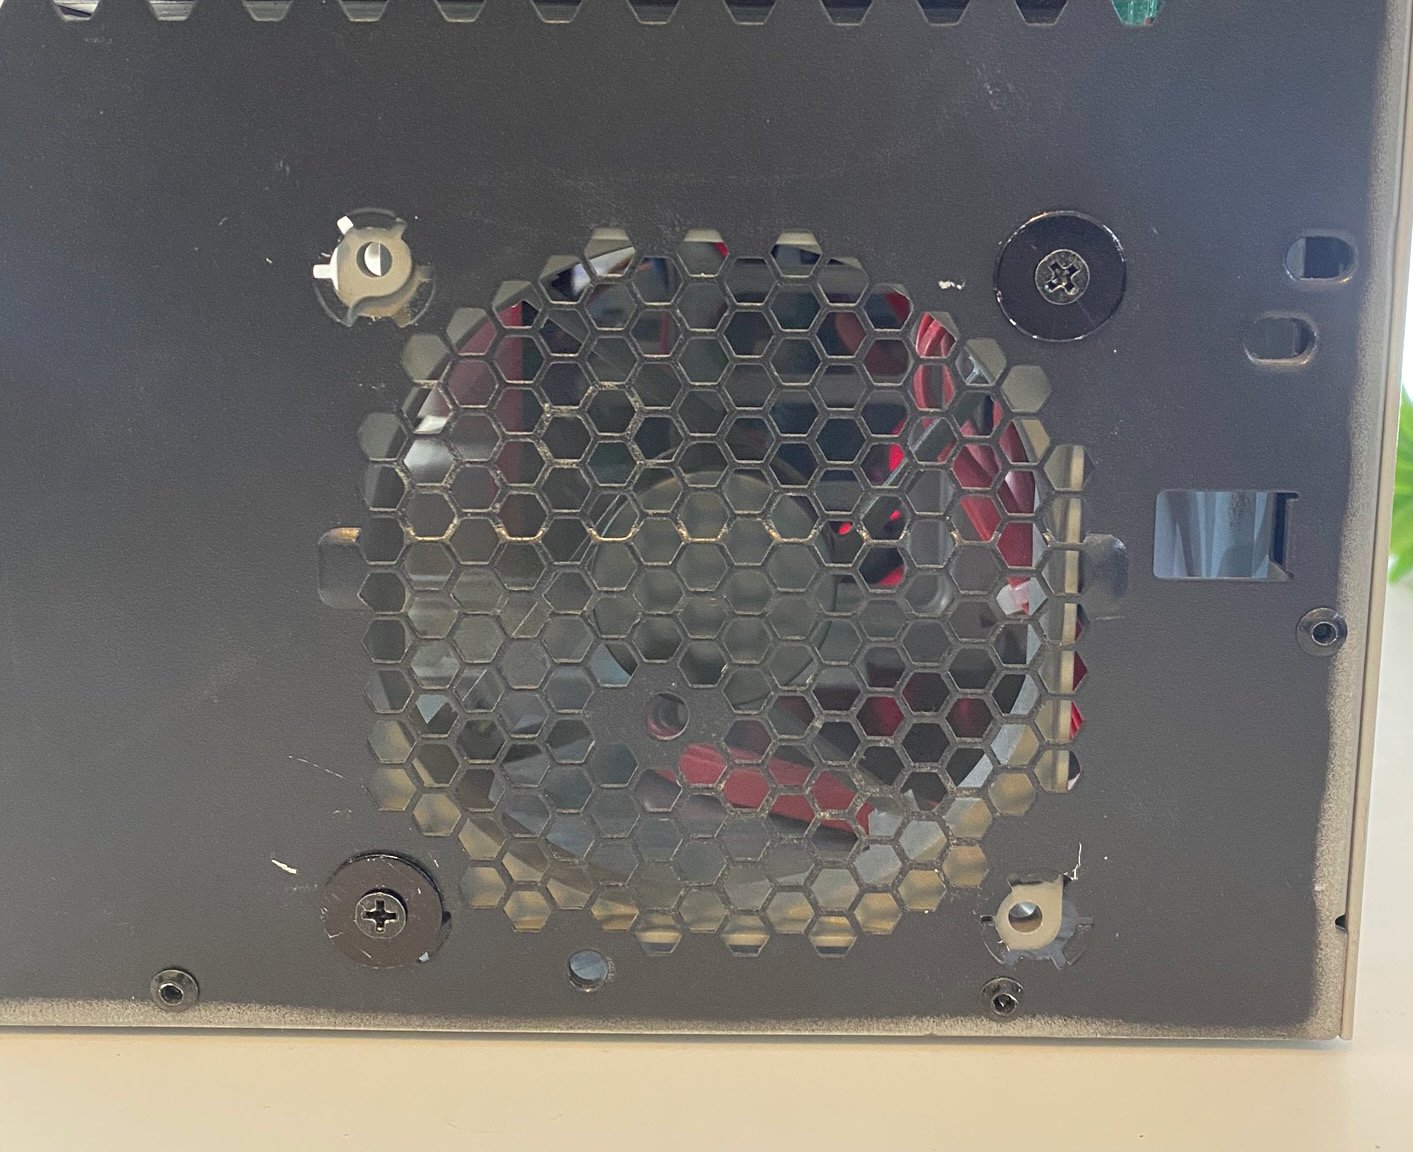
Front intake fan installed and running. Two of the washers fell under a filing cabinet I’m not going to move, so two are installed. Good enough!
Power
I’m glad I kept the power supply from the original ATX incarnation of my gaming PC. It’s a pretty nice one. EVGA SuperNOVA 550 G3. It’s 80 Plus Gold rated and modular, helping make for a clutter-free inside of the case.
Installing it required a bit of force. It was a couple mm off from lining up with the screw holes, and the “eco” switch bumped up against the case. A little bending of metal tabs was required.

PSU Installed
Storage
I’m dual booting the system between Linux and Windows. Windows is for gaming, Linux for everything else. Each OS gets its own Samsung 970 EVO M.2 NVMe. 512 GB for Windows, 256 GB for Linux.
One of the most awesome Sun-like features of this system is drive cage with backplane for hot swapping SATA or SAS hard drives. I had two 4 TB drives lying around after my NAS upgrade, so I put them in there. I gave one to Windows for game data overflow (some games are > 100 GB now) and one to Linux for my excessive use of virtual machines and just general junk. Important stuff still goes on the NAS.
By default, SATA hotplug support was not enabled in the BIOS. Enabling that means adding and removing drives while the system is running works perfectly.
I also had an old 500 GB SSD kicking around. I got a 2.5" to 3.5" adapter that correctly places the SATA connectors where they would be on a 3.5" hard drive, making the final assembly compatible with hot swapping.
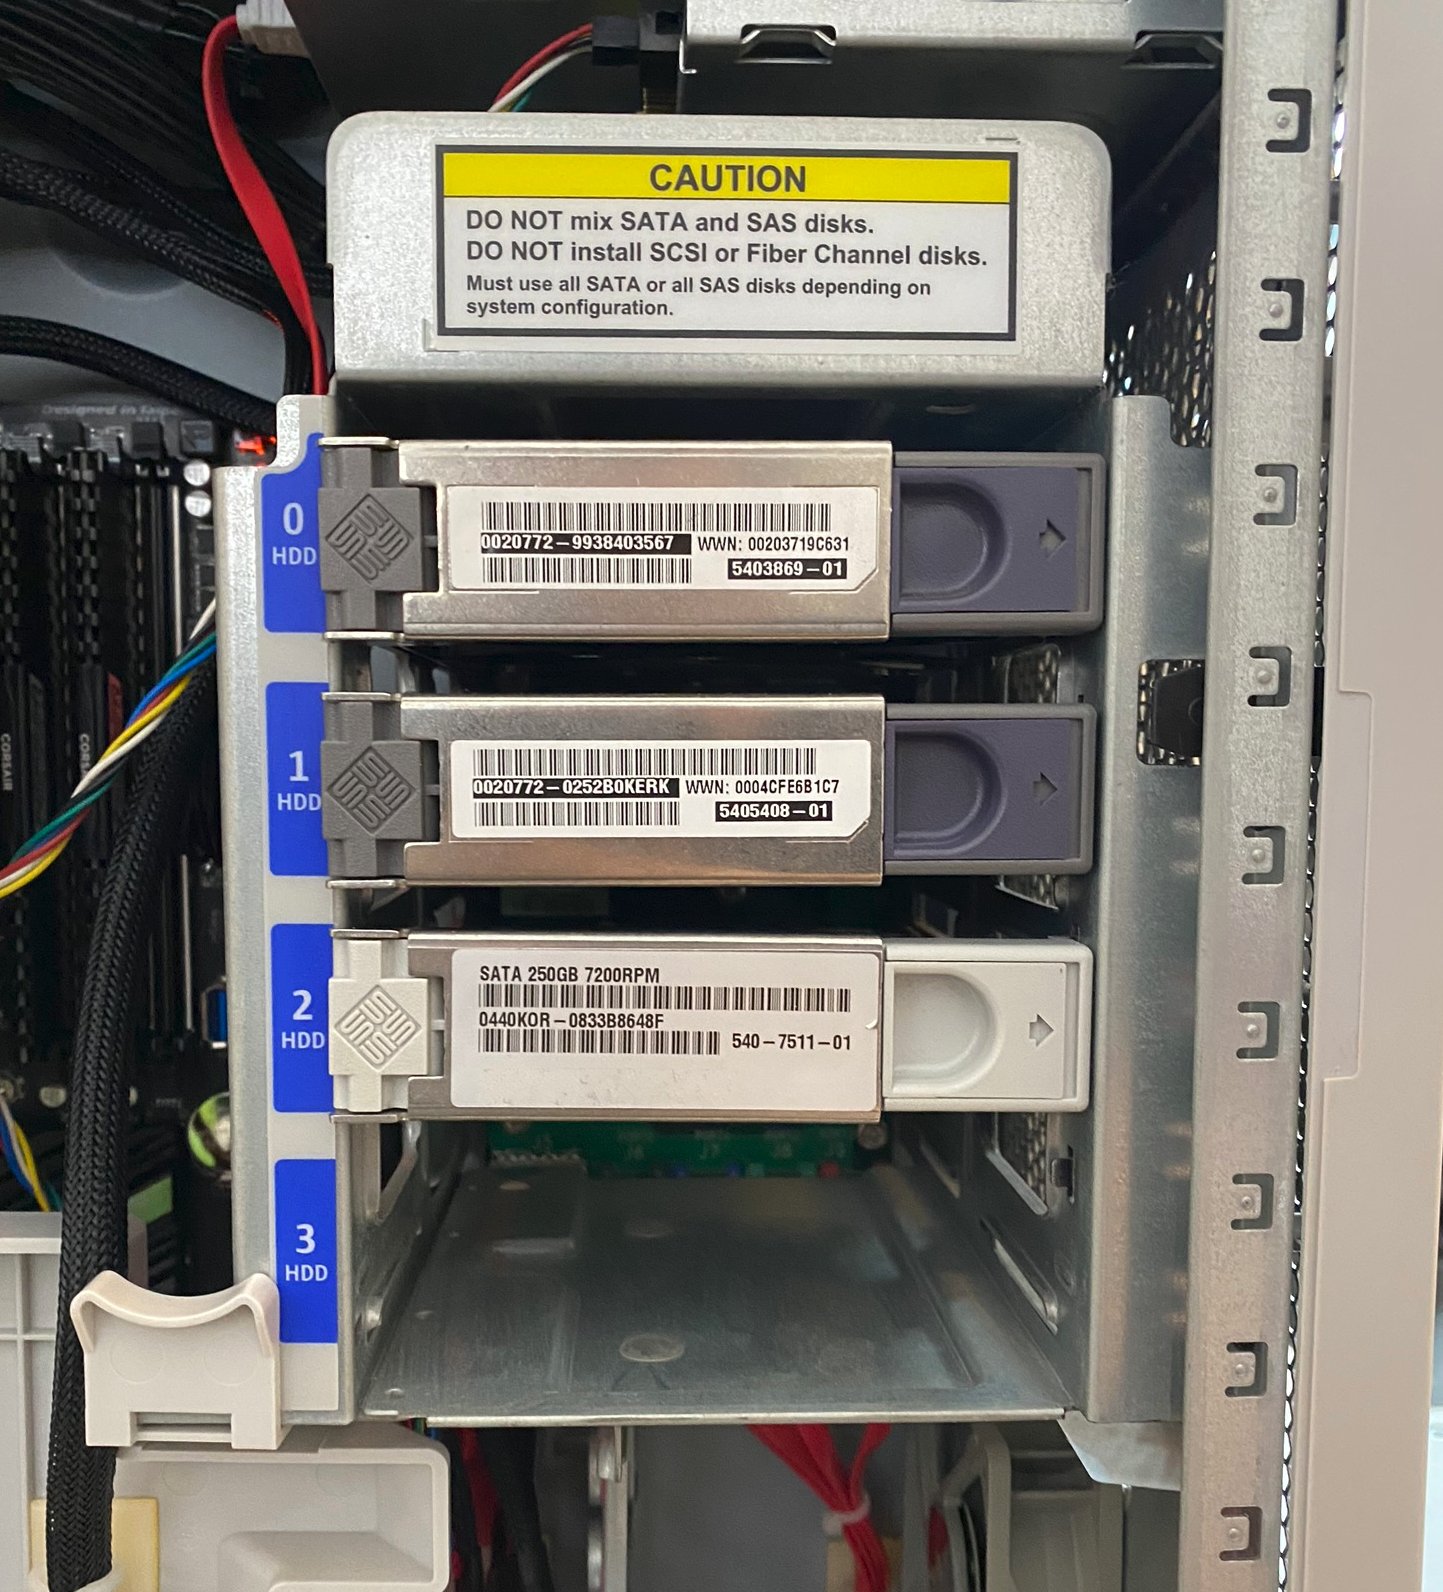
SATA hard drive cage with 2x 4 TB WD Red drives installed and the SSD. I got the purple drive spuds on eBay. They’re probably from a Sun Blade 1000 or Sun Fire. The other came with this system.

SSD in an adapter sled compatible with hot-swap

Installed NVMe drives for Windows and Linux
Front panel
The front panel of the system is a whole board you can remove from the system. It has:
- Power button
- Power LED
- 2x Firewire
- 2x USB
- Headphone and Mic
Using a multimeter for continuity testing I was able to see that the power button is wired up to 3 wires, oddly enough. White, yellow, and black. Black and white appear to both be wired to the same pin and yellow is on its own. So I just picked yellow and white to be my power buttons.
I traced the LED wires to blue and green. Not knowing which is positive or negative. I just tried it both ways. Green is positive.
| Colour | Purpose |
|---|---|
| Green | PWR LED + |
| Blue | PWR LED - |
| Yellow | PWR Switch |
| White | PWR Switch |
The power button and LED were all together in a block-style connector you see like for USB2 and front-panel audio. Fortunately it’s easy to pull the wires out. Then I borrowed some individual connectors from a breadboard kit and re-homed the connectors.
There are some other wires there. I don’t know what they do. I couldn’t find documentation. I assume grounding and maybe a power source for something?
The USB connection is a standard USB 2.0 connector and that fit right into my board.
The board doesn’t have a Firewire header, I don’t have a Firewire controller card, and I don’t have any Firewire devices. So that remains disconnected.
The front panel audio cable is standard but was too short for my motherboard. I took wires from a breadboard kit to make an extension and it works perfectly.
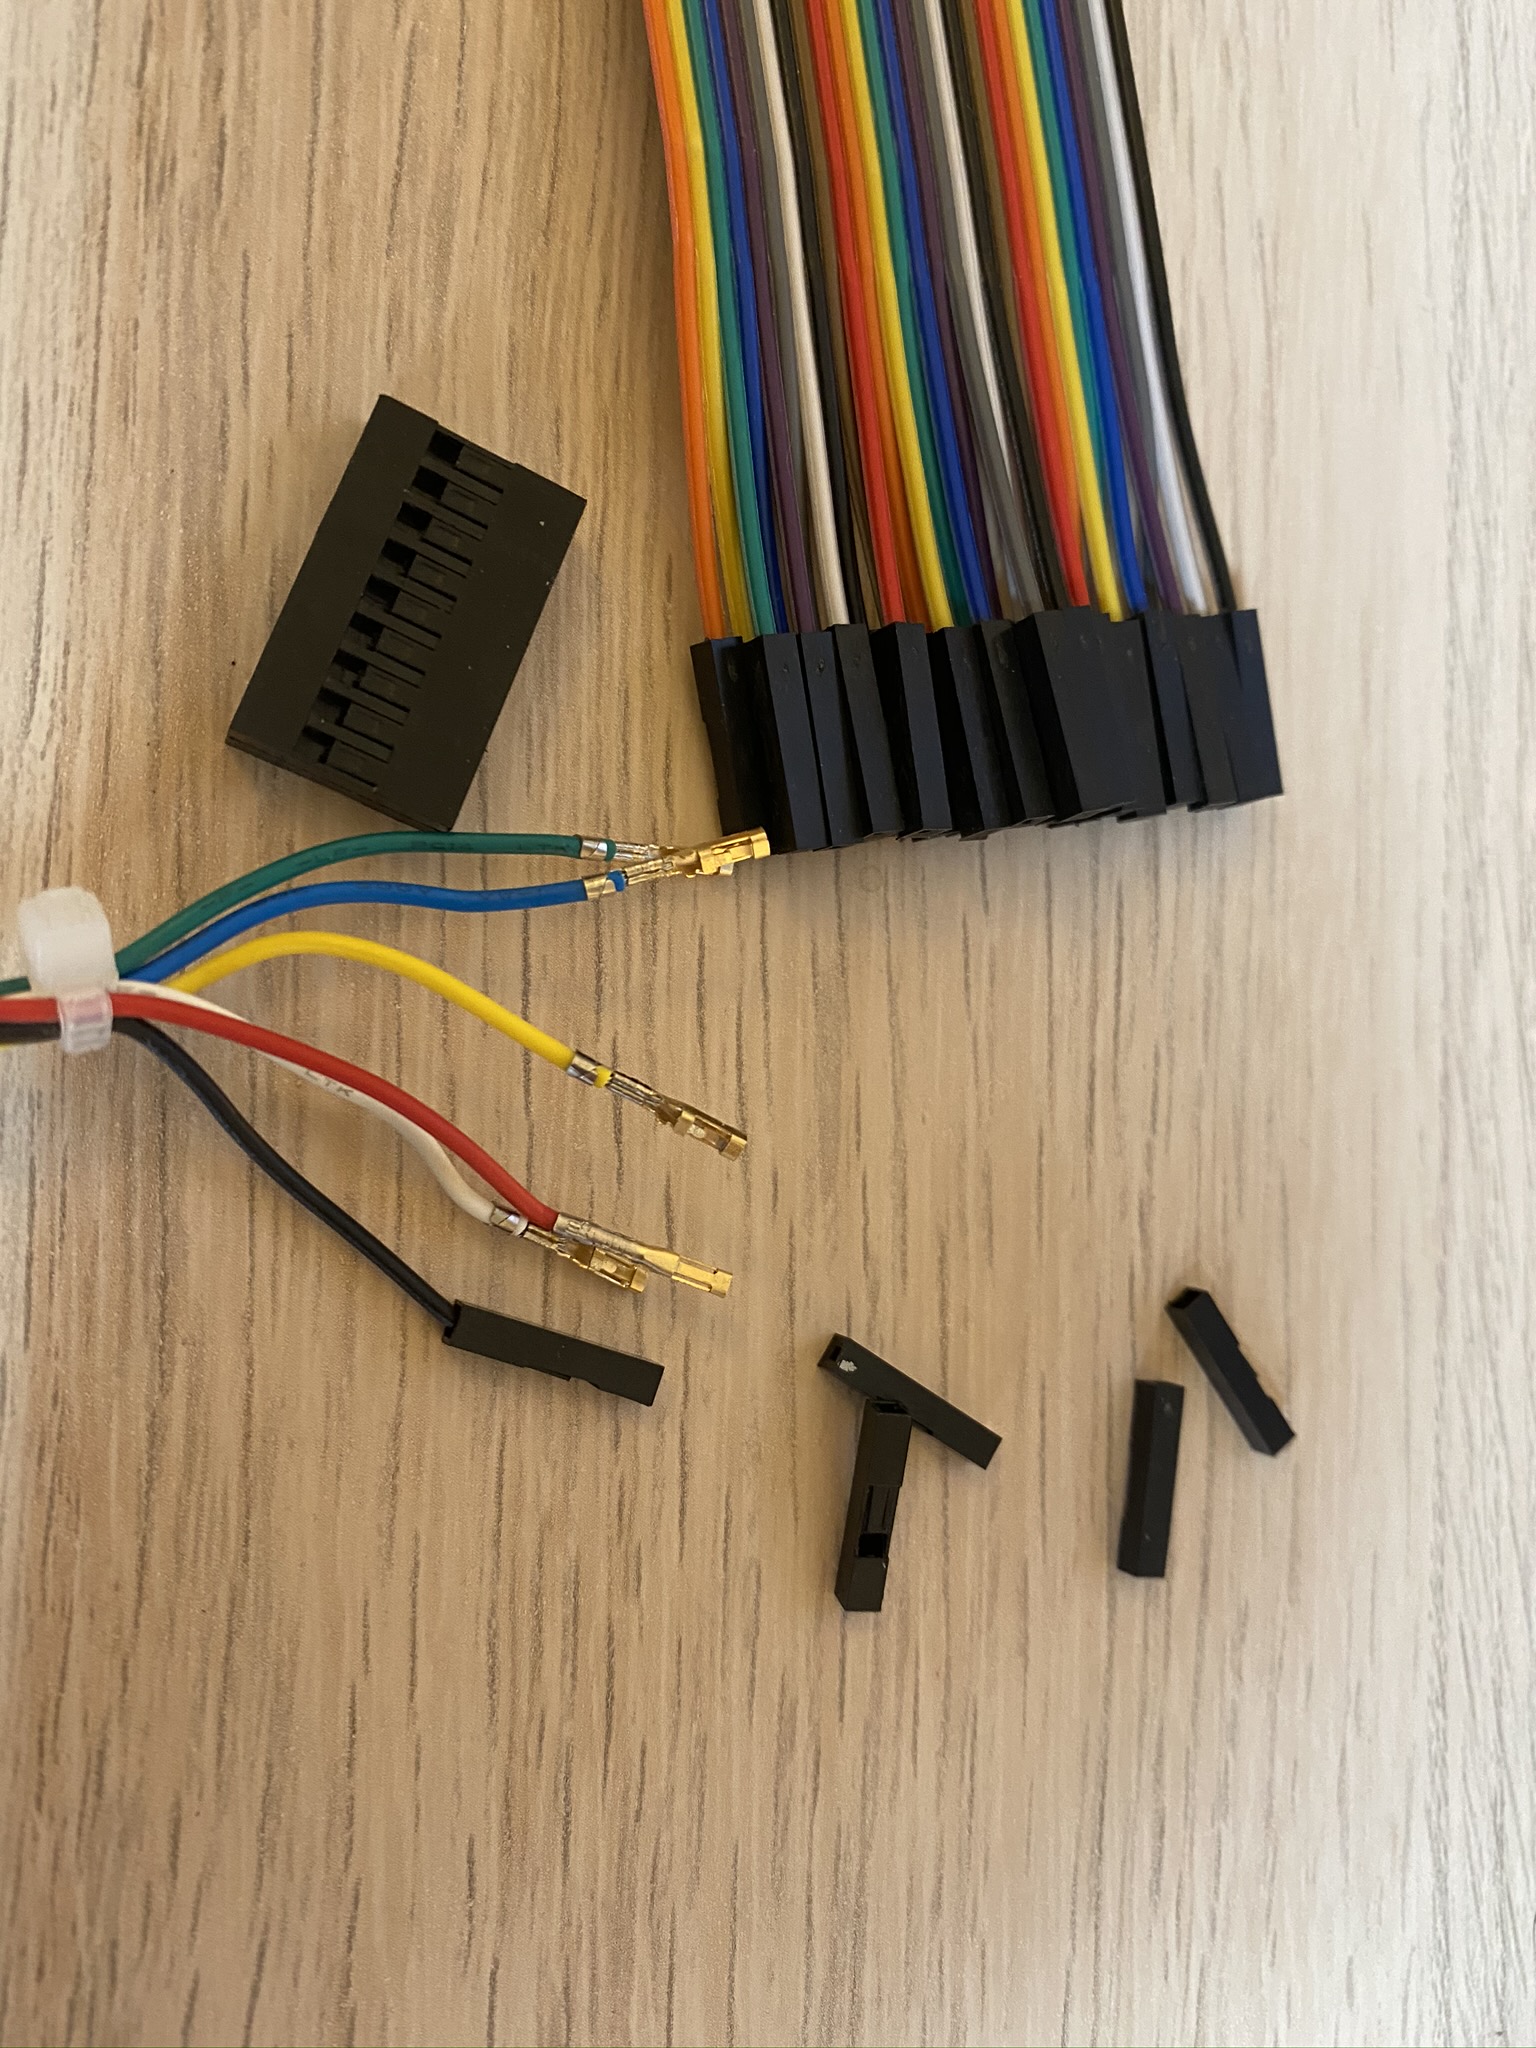
Disassembled front panel wires with donor female connector insulators from the breadboard wires.
Front I/O panel. LED, power switch, audio jacks, and USB 2.0 ports work.
Naming
Warning: We’re going on an adventure into the weeds here.
I wanted to give the system a good name. Naming things is always hard. On the spectrum of descriptive and literal to creative and fun, I usually tends towards the former.
The naming scheme in the Ultra series doesn’t have an obvious pattern where you can see a clear progression. One problem is the Ultra moniker spans both workstation and server lines. But let’s focus on workstations.
It started with the Ultra 1 and Ultra 2. Makes sense. Then the Ultra 30. Bit of a jump, but ok. Then the Ultra 5 and Ultra 10 that were the next generation in different form factors: desktop and tower. But now we’ve moved backwards in number. The Ultra 60 and Ultra 80 were next. So there was a generally linear progression here, aside from the jump from 30 back to 5. For the next few years we had the Blade series for the workstations. Blade 100, 150, 1000, 2000.
In 2005 Sun revived the Ultra moniker, this time with a mixture of architectures as they started offering x86-64 processors from AMD and Intel. The model numbers spread all over the previous spectrum.
| Model | Processor | CPUs | Codename | Announced * |
|---|---|---|---|---|
| Ultra 3 | UltraSPARC IIIi | 1 | Unknown | 2005-07 |
| Ultra 20 | AMD Opteron 200 Series | 1 | Marrakesh | 2005-01 |
| Ultra 20 M2 | AMD Opteron 2000 Series | 1 | Munich | 2006-08 |
| Ultra 24 | Intel Core 2 Duo, Quad | 1 | Ursa | 2007-10 |
| Ultra 25 | UltraSPARC IIIi | 1 | South Side | 2006-09 |
| Ultra 27 | Intel Xeon 3500 Series | 1 | Volans | 2009-04 |
| Ultra 40 | AMD Opteron 200 Series | 2 | Sirius | 2006-01 |
| Ultra 40 M2 | AMD Opteron 2000 Series | 2 | Stuttgart | 2006-11 |
| Ultra 45 | UltraSPARC IIIi | 2 | Chicago | 2006-01 |
* I did the best I could based on searching through news.
Or grouped by architecture:
- UltraSPARC: 3, 25, 45
- x86-64: 20, 24, 27, 40
Let’s ignore the Ultra 3 as it’s a laptop. There are otherwise a few patterns here:
- Single socket machines are 2X
- Dual socket machines are 4X
- Both Intel systems are named after constellations
- AMD M2 systems are named after German cities
Looking through the history of all Ultra machines, these are the codename categories:
- Space: Quark, Deuterium, Quasar, Pulsar
- People: Darwin
- Animals: Sea Lion, Otter
- Cities: Stuttgart, Munich, Chicago, Marrakesh
- Constellations: Sirius, Ursa, Volans
So this pattern is that there is no pattern. A blind guess is the only way to imagine what may have come next from Sun.
So I named it ultra. I know, anti-climactic. After all this research into this history of Sun nomenclature, I’ve got nothing.
The Build
First, some old parts had to go. I removed:
- Original power supply
- Motherboard
- Graphics card (NVIDIA Quadro FX 580)
- Rear exhaust fan
Assembling the new system was a pretty standard process for an ATX build. Though the case doesn’t have space for cable management behind the motherboard tray, it has a bunch of tie-downs in the main compartment that make it easy to keep things tidy.
The motherboard tray does not have a cutout behind the CPU which means you have to install the cooler with its backplate before installing the motherboard.
Otherwise, no real hiccups. The SATA cables were all the right length for this board, the front panel connectors were too. Front panel audio connector didn’t reach, but that’s no show-stopper.

Ready to install the motherboard!
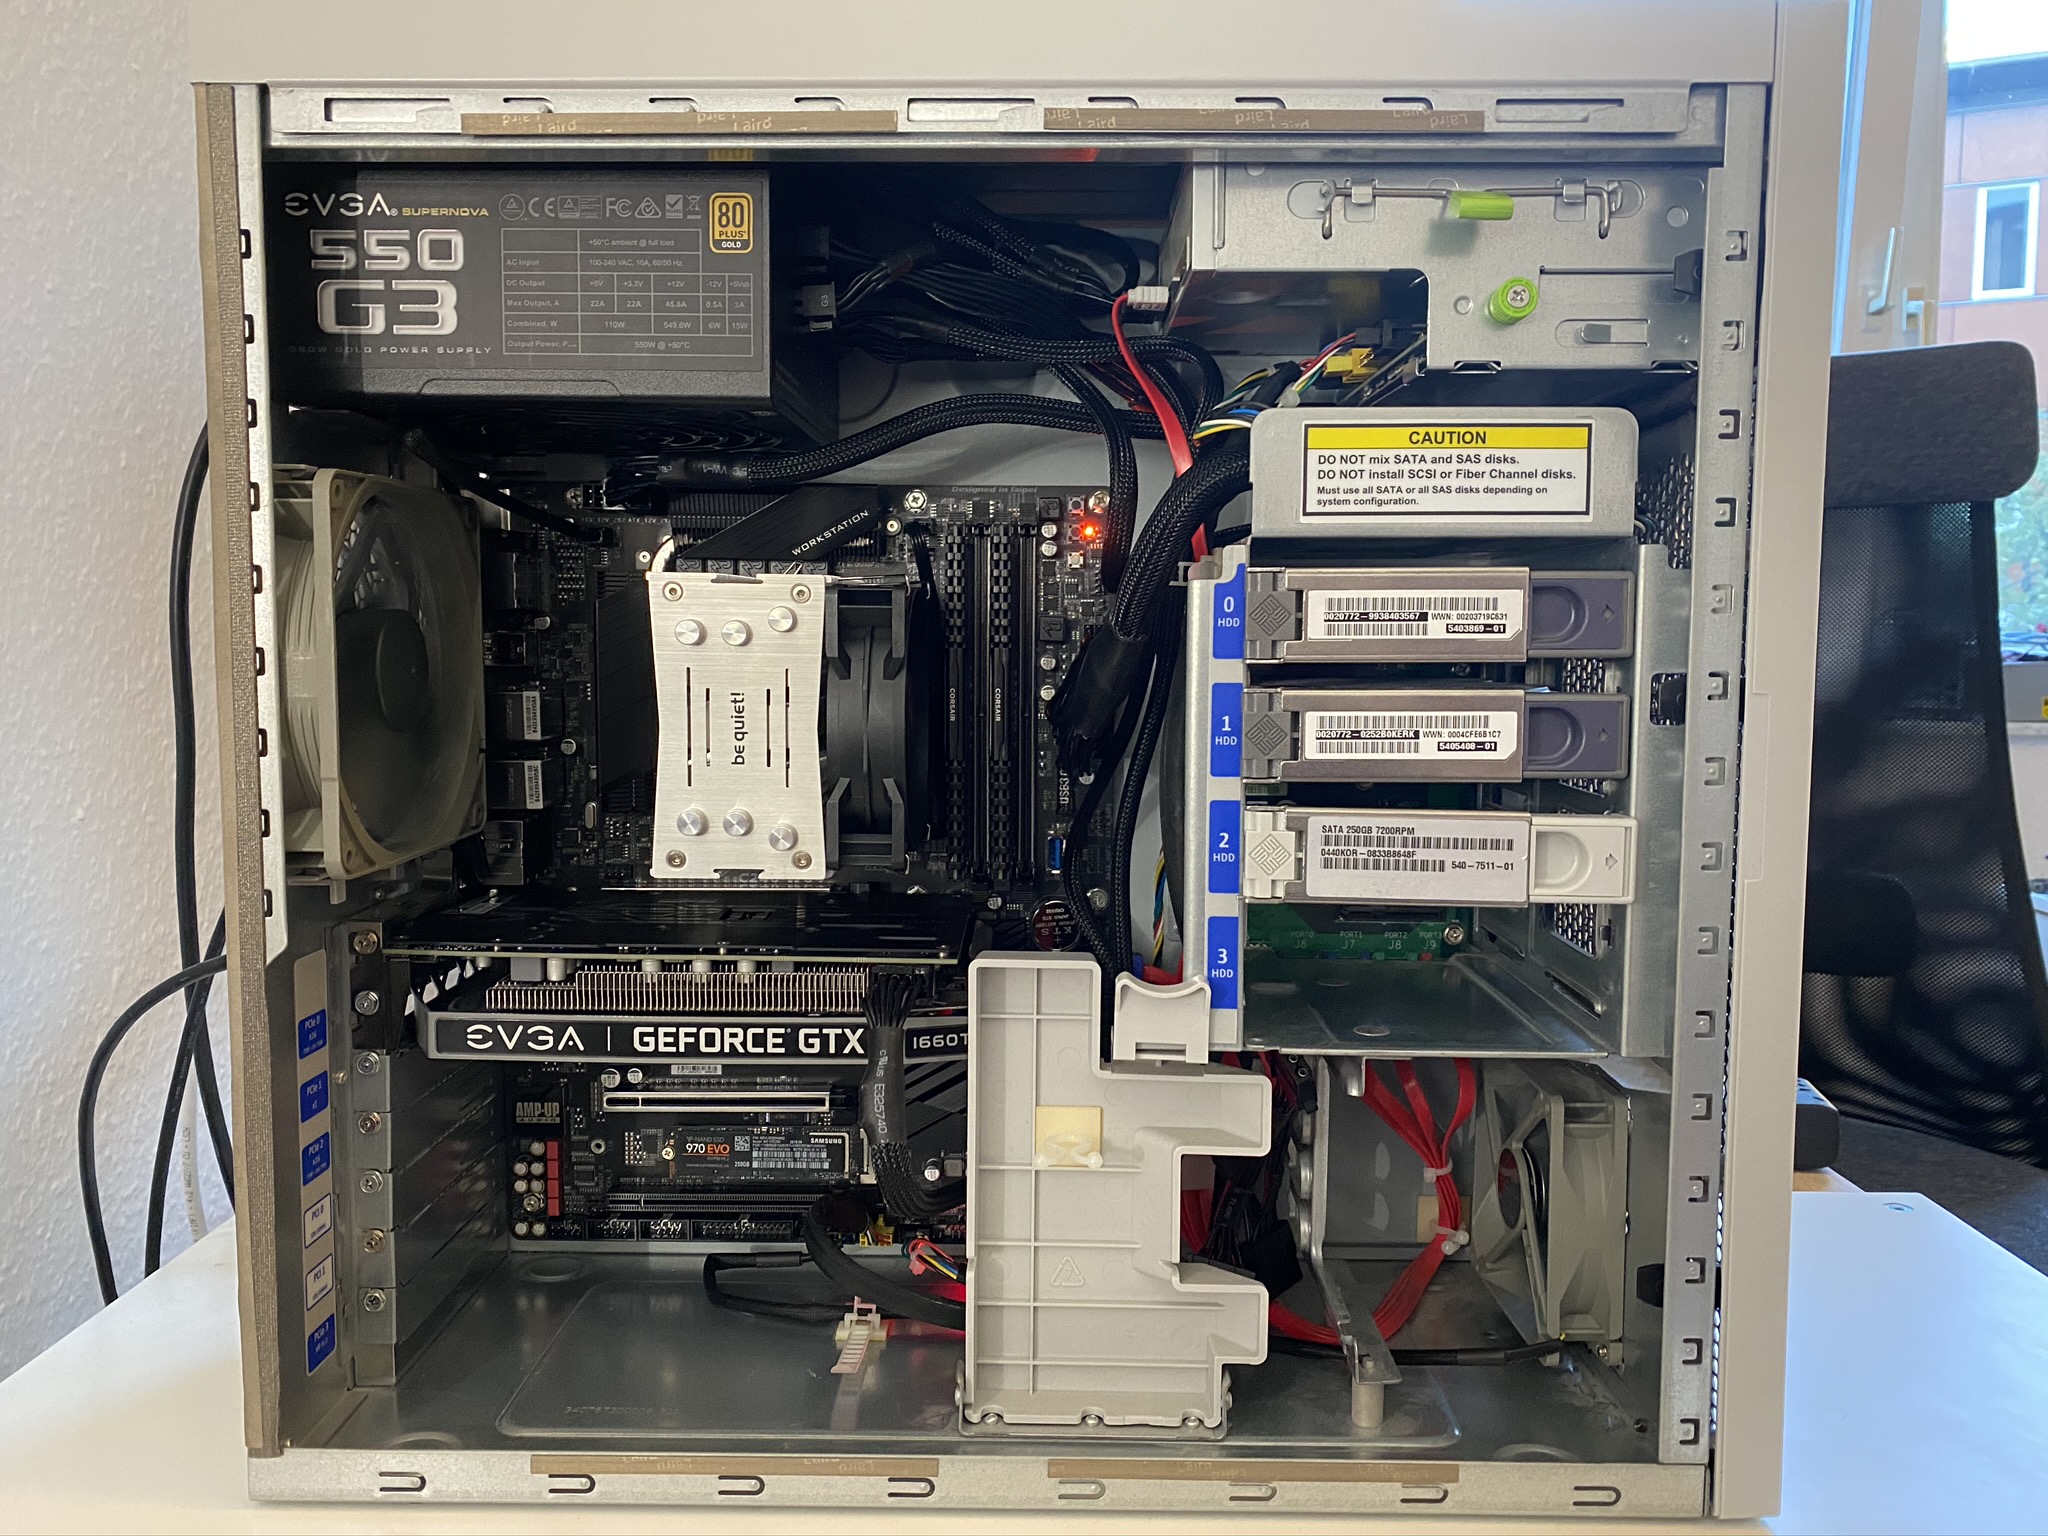
Everything installed!
Conclusion
I’m really happy with this build. The workstation-grade motherboard feels like a good fit for this system. Being able to keep the original DVD drive and hard drive cage in working order makes me happy.
The system runs Debian and Windows 10 perfectly as you’d expect. The system is quiet under load. It works and it’s a beautiful thing on my desk.
Specs
| Component | Description |
|---|---|
| CPU | Intel Core i5-8400 |
| RAM | 16 GB Corsair Vengeance LPX DDR4 |
| GPU | EVGA NVIDIA GeForce 1660 Ti SC |
| Storage | 250 GB Samsung 970 EVO 500 GB Samsung 970 EVO Plus 500 GB Samsung EVO 850 SSD 2x 4TB Western Digital Red |
| Cooling | Noctua NF-S12B Noctua NF-B9 |
| Network | 2x Intel Gigabit Mellanox ConnectX-3 SFP+ for 10 GbE |
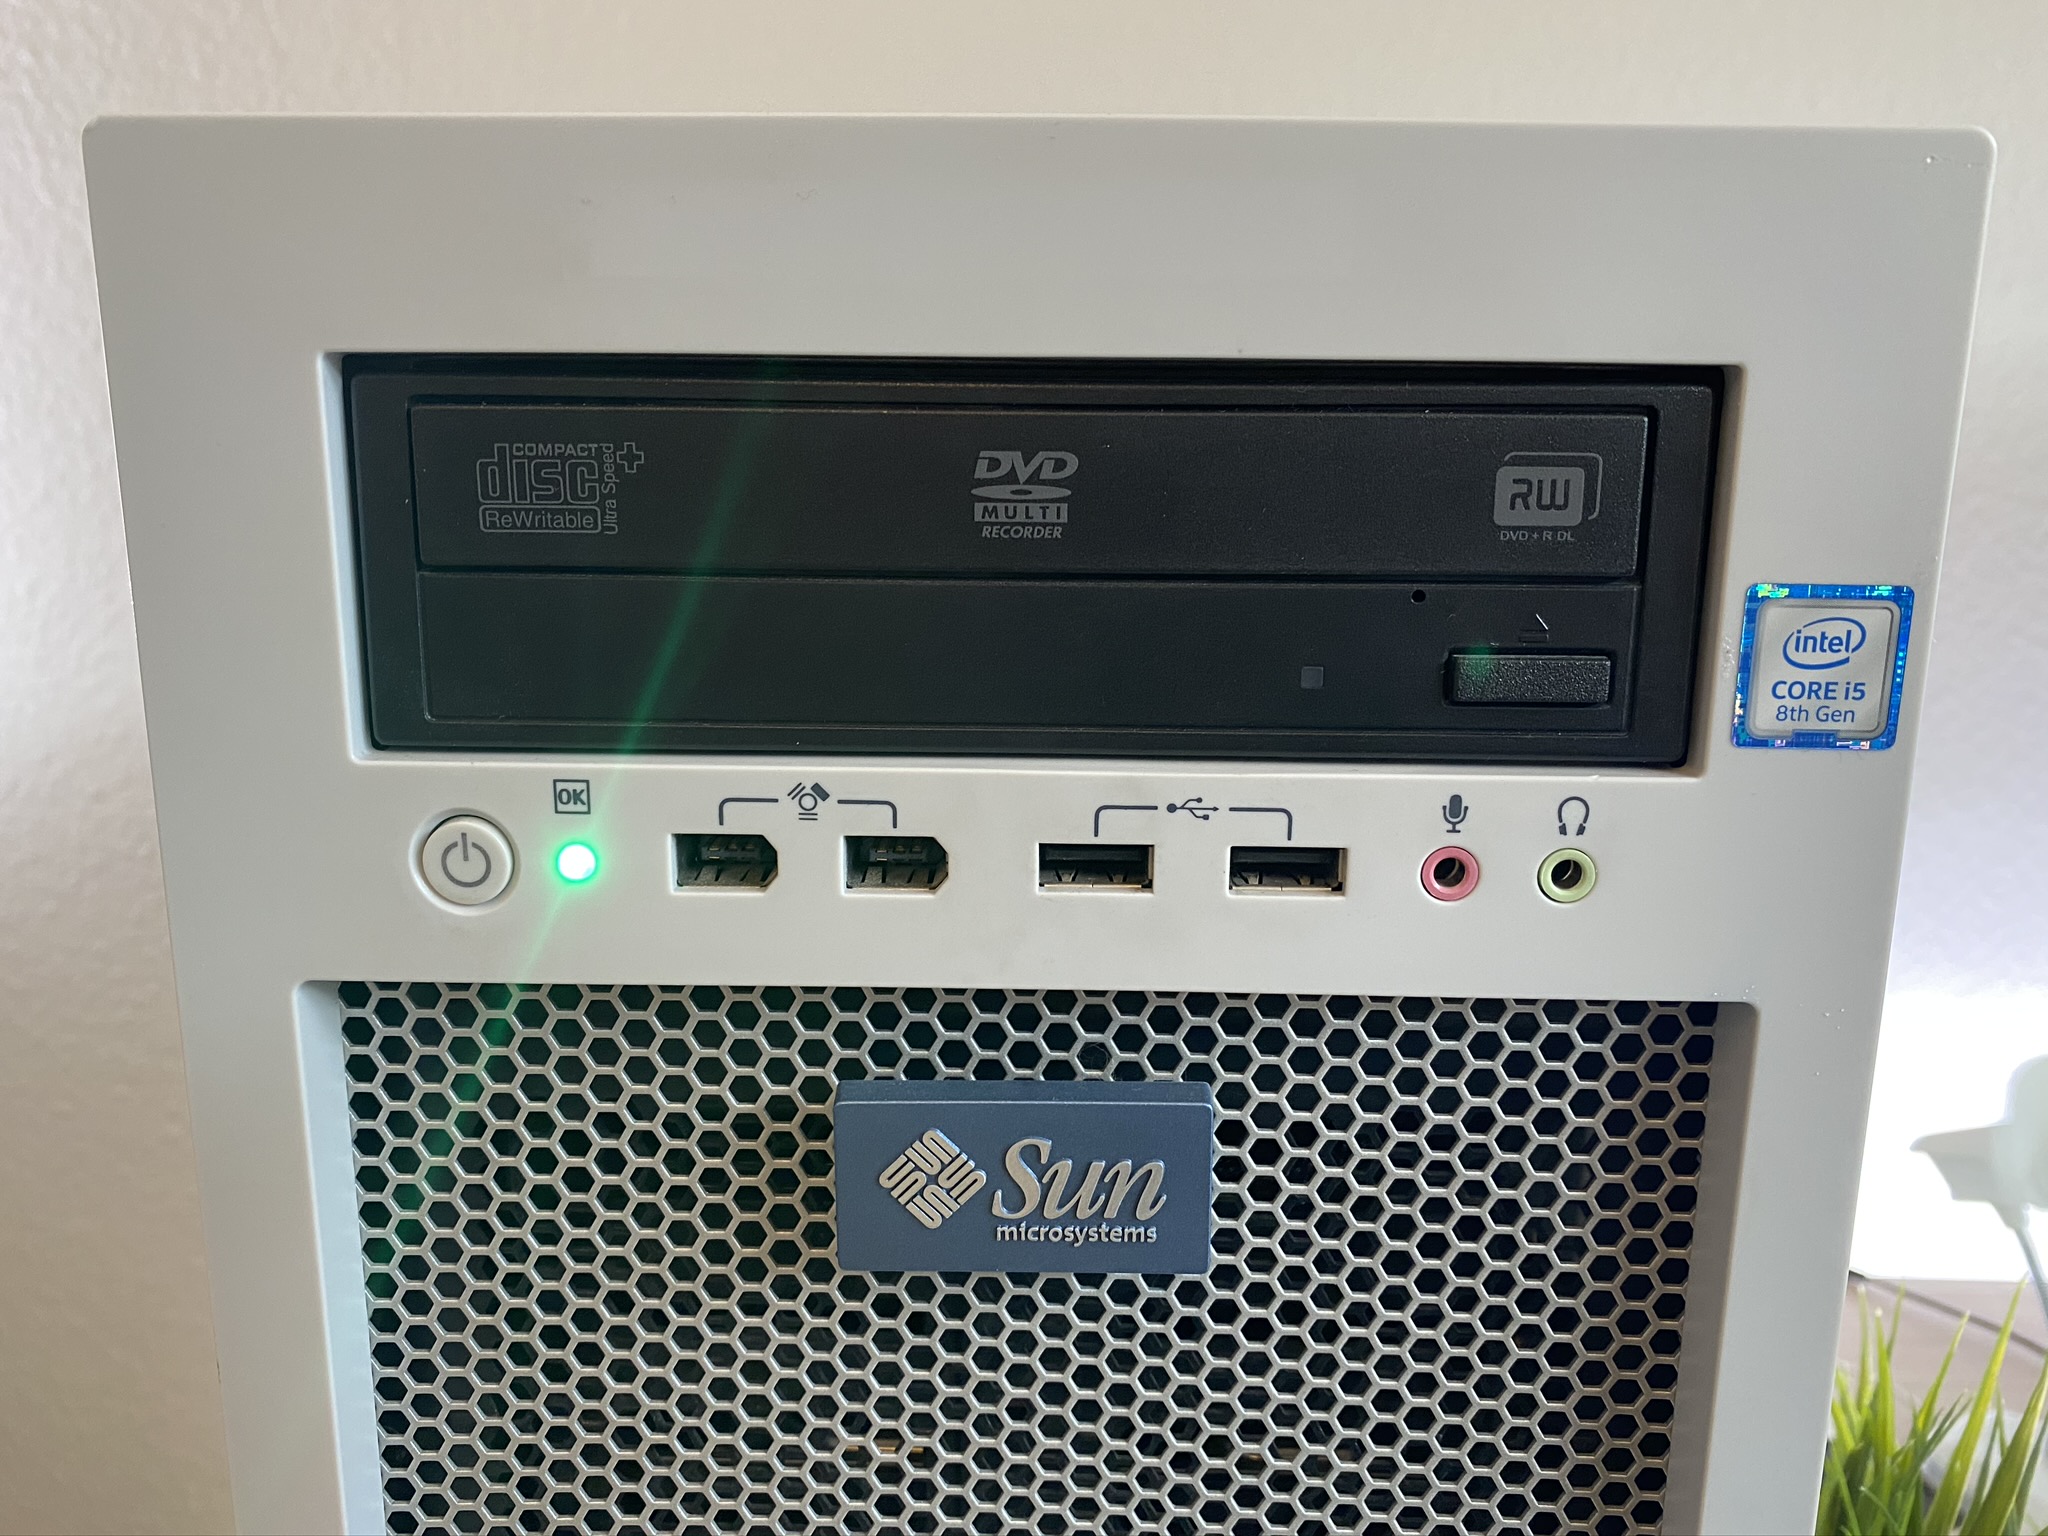
Powered-on system with Core i5 badge in place of the old Core 2 Quad badge
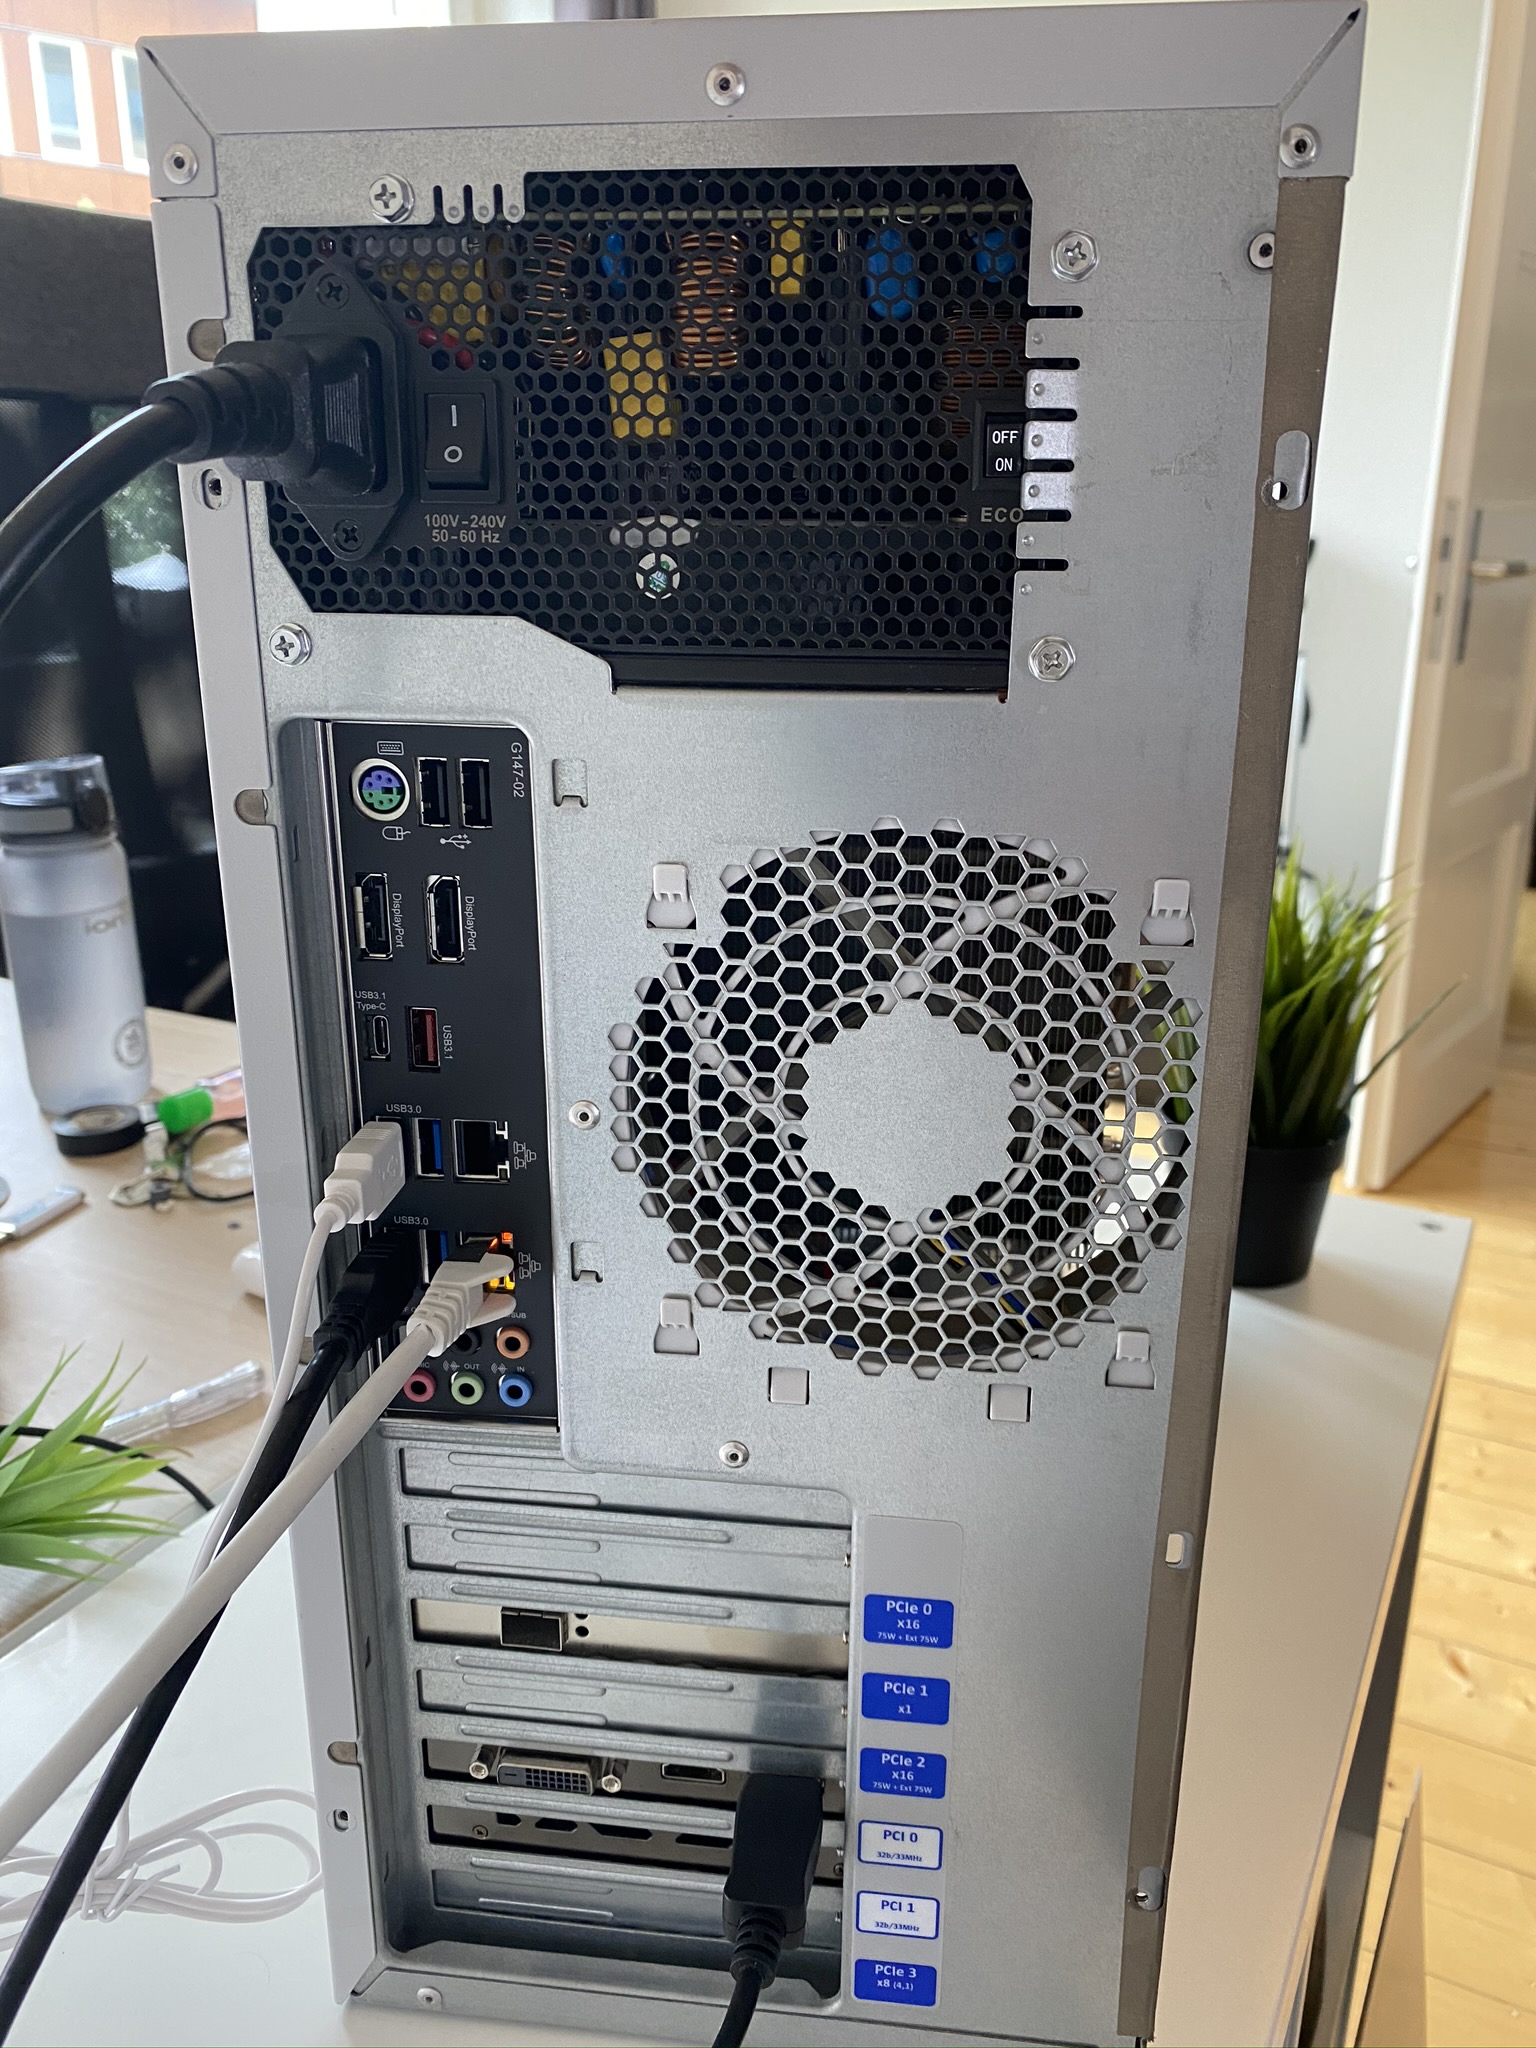
Back of the system. Clean look to the I/O shield, fan colour fits right in, SFP+ port ready for some 10 GbE action.

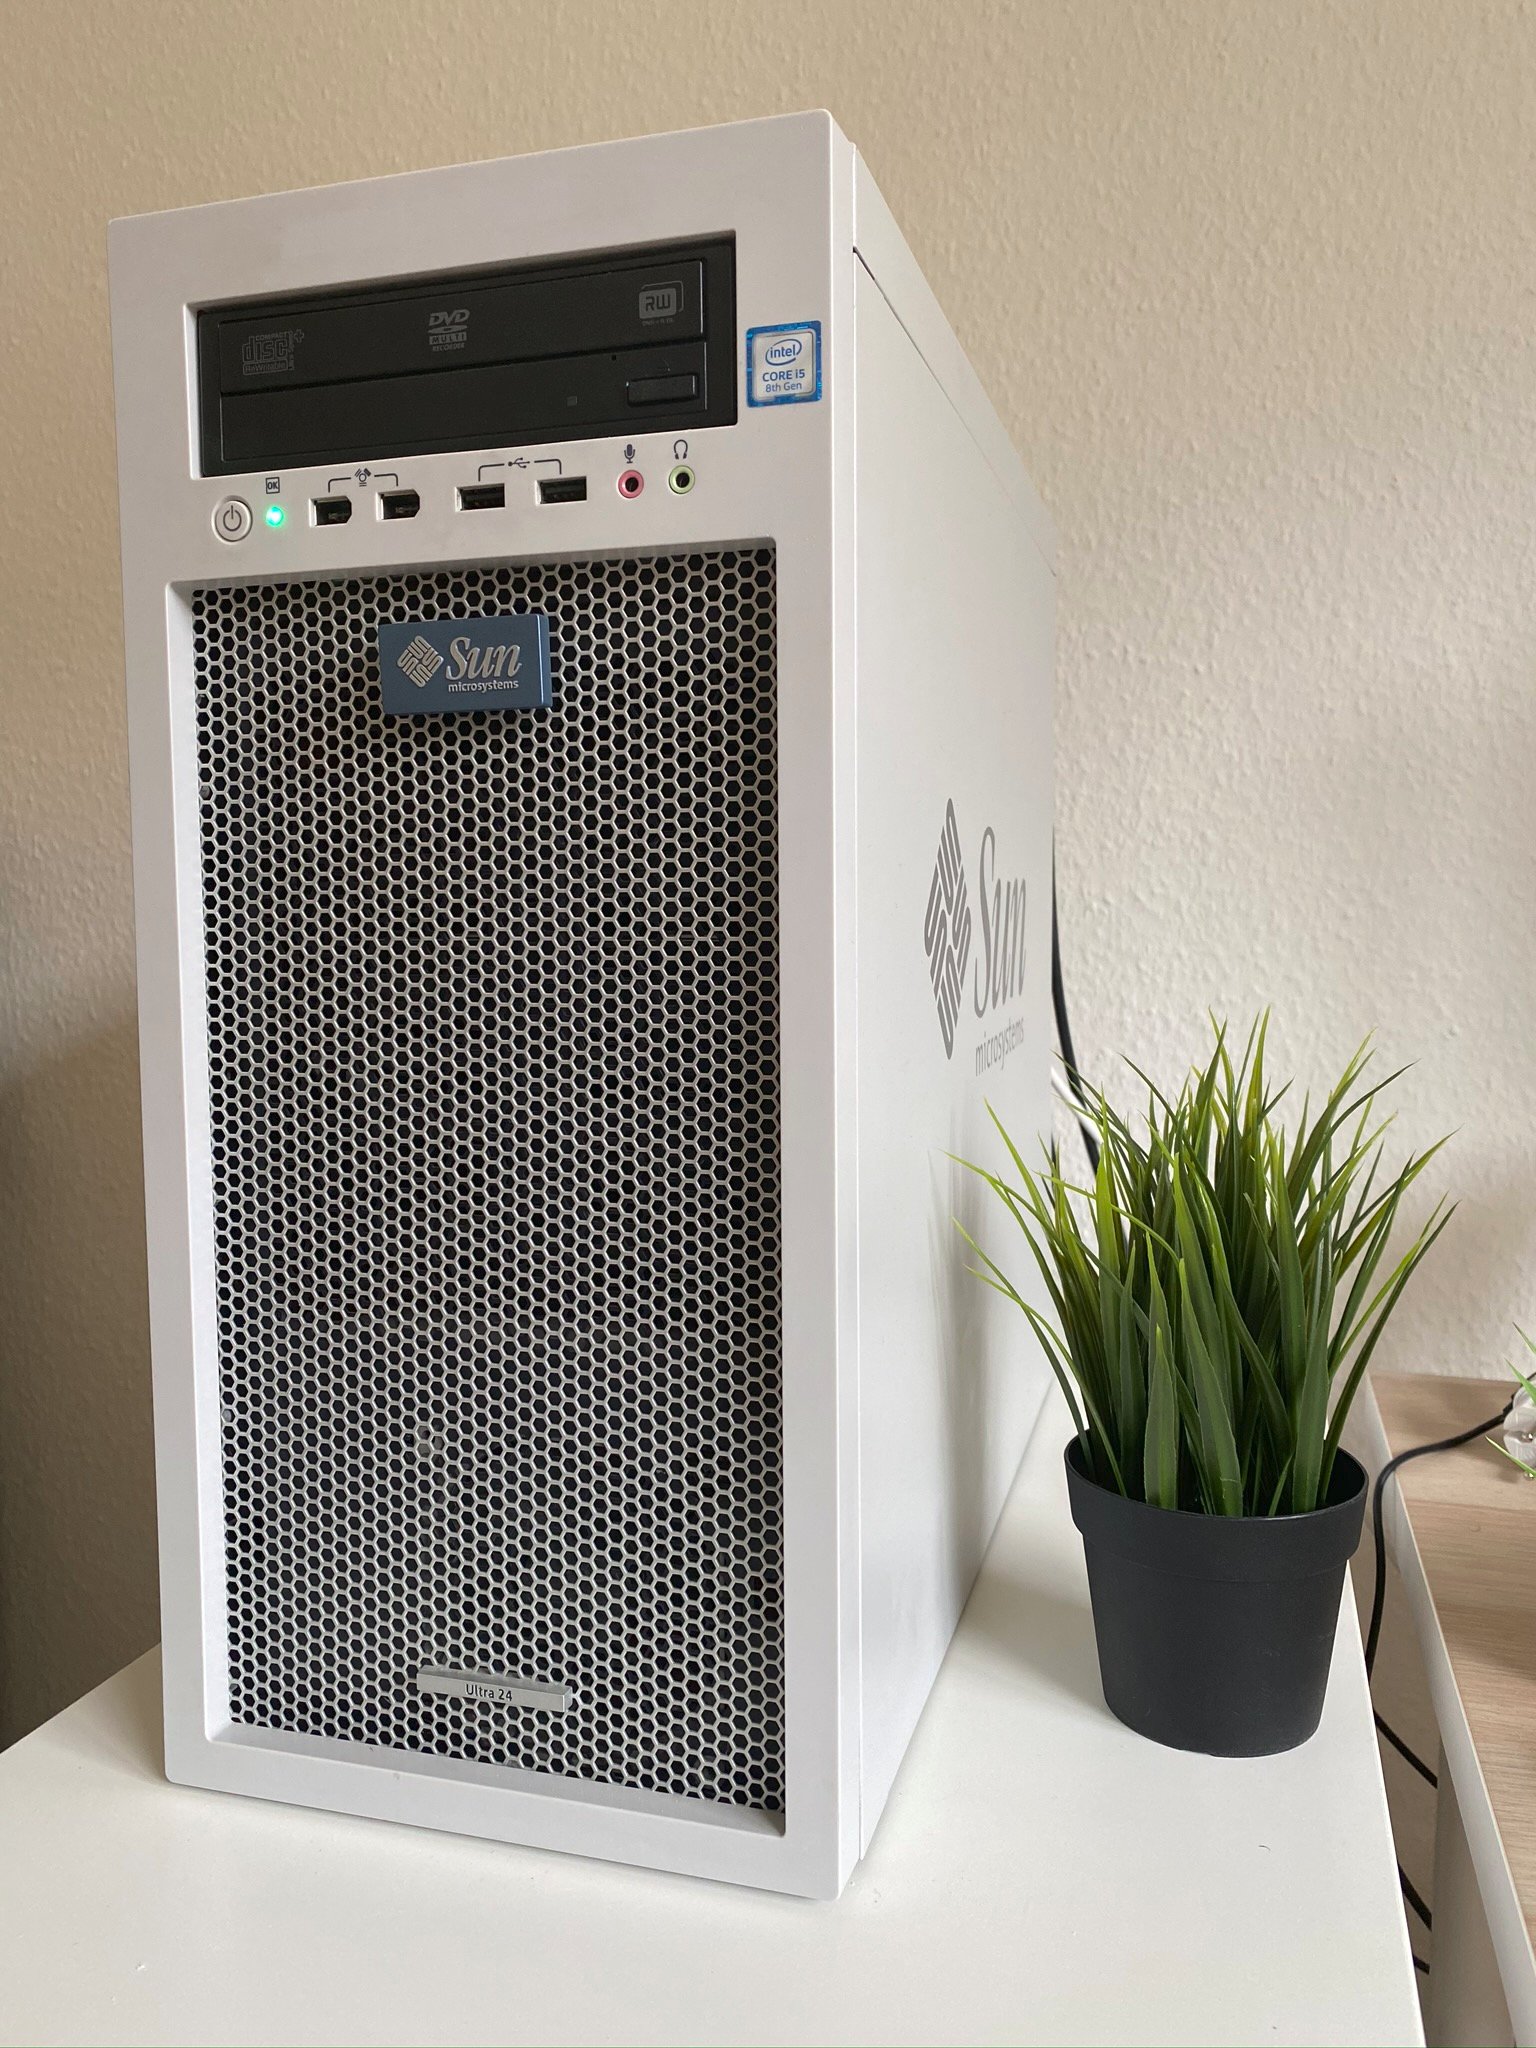
My new, beautiful battlestation.
I hope this sparked some joy with other fans of Sun Microsystems. Please reach out if you have any questions or are thinking of doing a build like this!