
Windows NT 4 on libvirt
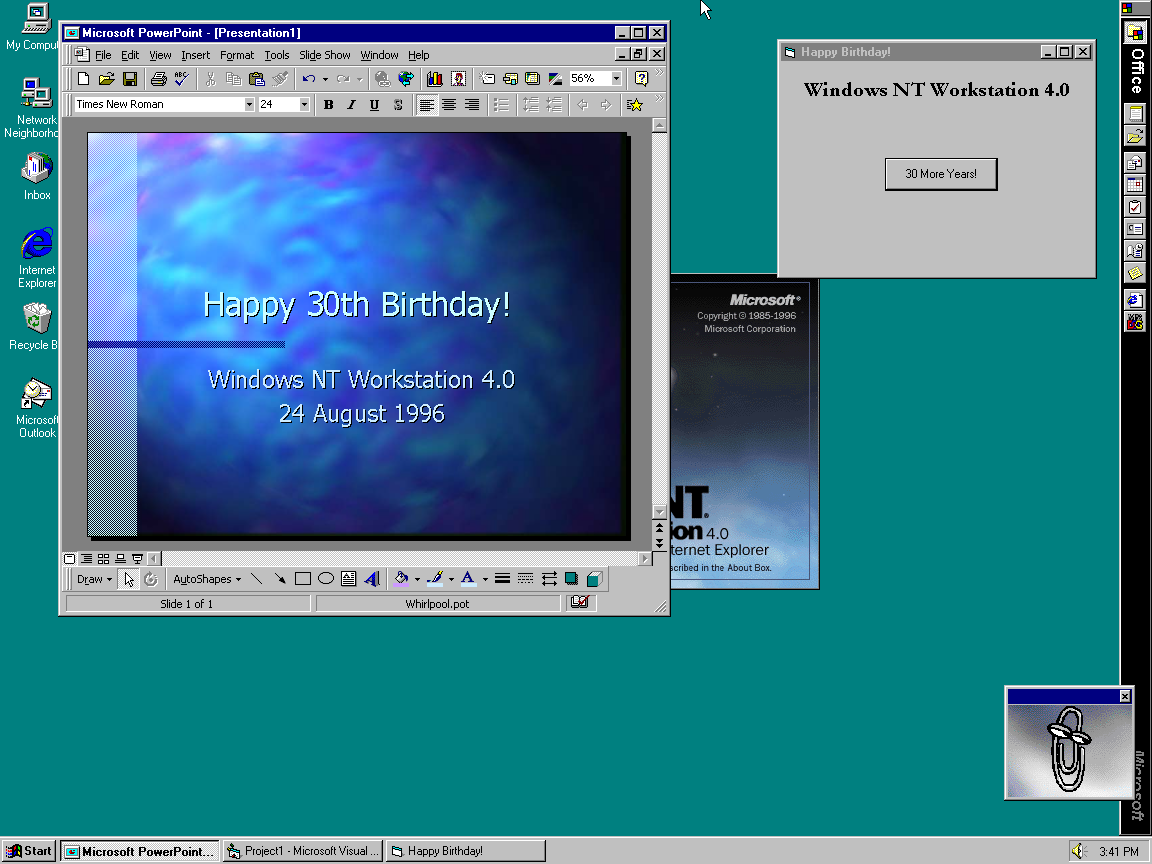
To celebrate 24 August 2026, the 30th anniversary of Windows NT Workstation 4.0’s release, I put together a guide for how to get it up and running smoothly in libvirt on Linux.
This guide works for NT 4 Workstation, Server, and Terminal Server.
Drivers
This guide aims to provide the best possible NT 4 experience in qemu, and that requires bringing some of your own drivers. The big ones are for:
lsilogicSCSI controllerrtl8139100 Mbit network adaptervgahigh-resolution graphics adapter
I’ve assembled a floppy disk image with all necessary drivers: qemu-nt4.img and this guide assumes you’re using it.
Create a new VM
When creating a new VM, libvirt won’t detect the OS from the install media.
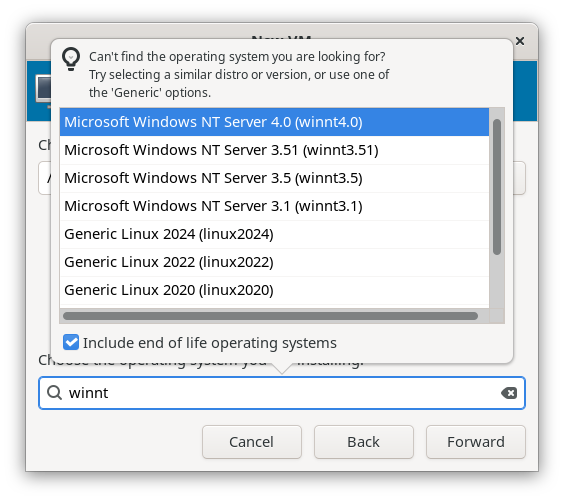
OS Select
- Open the search box
- Tick Include end of life operating systems
- Pick Windows NT Server 4.0 (winnt4.0)
Disk
I pick a disk size of 4 GB since the NT installer won’t let you format and install to a C: drive larger than 4 GB. You can always add more disks later.
RAM
128 MB of RAM is typically ample for NT.
Don’t install, yet
At the last step, do not begin installation yet. We have a bunch of settings to change. Tick Customise configuration before install.
Configuration
CPU
Disable Copy host CPU configuration. Set the model to pentium.
If you don’t set this to pentium, the VM will halt during the text-phase of setup.
Boot Options
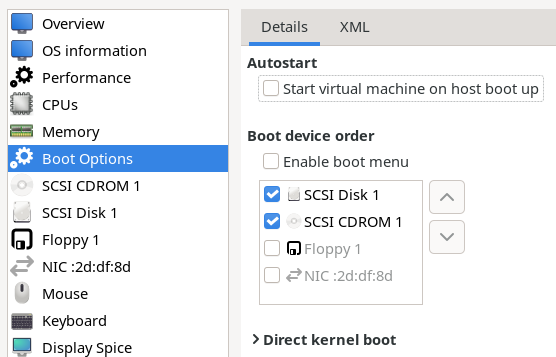
Optional, but a quality of life change to make here.
The Windows NT installation CDs will always boot directly into the installer. There is no “press spacebar to install…” with a timeout like Windows 2000 and XP have.
To avoid having to eject and re-insert the virtual CD-ROM multiple times, make the hard drive have first boot priority. With a blank hard drive image, you’ll boot into the installer, and after the first phase, off the hard drive.
SCSI
NT Workstation and Server will work with IDE drives. Terminal Server Edition however will not. The installation will throw several errors about missing files, and once you boot into the OS, you’ll start getting reports of disk corruption and eventually the system will run a disk check and crash on every boot.
Aside from that, SCSI has significantly better performance than IDE.
So, don’t use IDE. Use SCSI for both the hard drive and CD-ROM drive.
If you really want to use IDE, you’ll want to install ATA drivers to fix the performance issues. That’s covered later on.
Drive cache mode
If you don’t change these settings, you’ll get random I/O errors during installation and VM usage that can be fatal.
For both SCSI Disk 1 and SCSI CDROM 1, under Advanced options, change the Cache mode to writethrough.
Network
You have two options when it comes to network cards in libvirt/qemu.
Windows NT 4.0 has built-in drivers for the pcnet network card. This is a 10 Mb
card from AMD and works fine, but you’ll be limited to 10 Mbit which can be rough
depending on what you use the VM for.
You won’t find pcnet in the Device model dropdown, but you can type it in or edit the XML.
Your other option is the Realtek rtl8139. This is a 100 Mbit card that’s well-supported
by NT 4, but you’ll need to bring your own drivers.
Sound
Windows NT 4 has built-in support for the Sound Blaster 16 card. You’ll have to edit the XML configuration to set use model and configure the ISA bus.
<sound model="sb16">
  <alias name="sound0"/>
  <address type="isa" iobase="0x220" irq="0x7"/>
</sound>
Video
There are multiple video card models that can work in NT and provide high resolution and high colour depth graphics.
vga- With the VirtualBox VBE Miniport driver or QEMU std-vga drivervmvga- With the VMWare SVGA driver
The no-driver option is cirrus which will at least give you decent colour depth
at low resolutions.
Floppy drive
You have to add a floppy drive so you can install the SCSI controller drivers during the initial OS installation. Add a drive and use the provided driver disk image.
During NT installation
SCSI Drivers
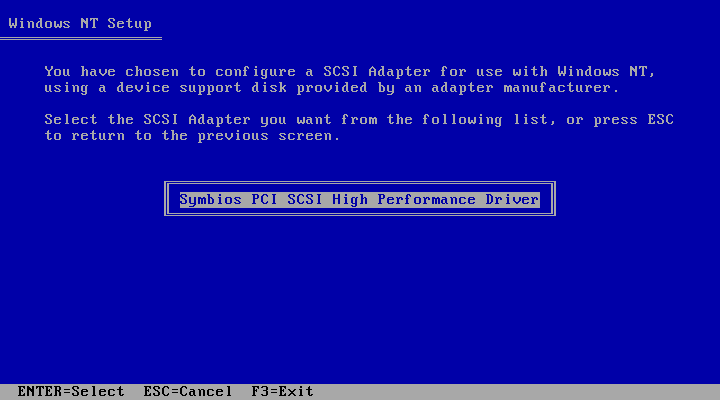
As soon as you see Setup is inspecting your computer's hardware configuration...,
start mashing
F6
. You’ll then soon be prompted to specify additional
devices by pressing
S
.
The option Other is already selected. Press Enter twice and you should see Symbios PCI SCSI High Performance Driver. Press Enter twice more to continue setup.
Network
- If you’re using
pcnetas your NIC, you can auto-detect this during setup. - If you’re using the
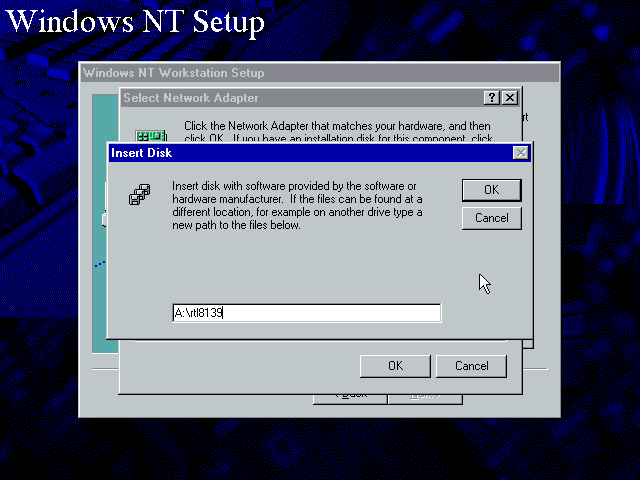
rtl8139and have the floppy driver disk available, you can get the NIC installed at this point.
You can of course always add networking support after the initial installation.
Display
- DO NOT try to change the display settings at all. It’ll hang the VM and you’ll have to hard-reset and start the graphical portion of the install over again.
Post-install
Once your new NT install is up and running, there are few more things you’ll want to do.
ATA Driver
If both your HDD and CD-ROM are SCSI, skip this section.
By default, your disk I/O will be running in PIO mode which is terribly slow. Unless you want your VM to feel like you’re running on a vintage 486, you’ll want to install an ATA driver so you’re running in DMA mode.
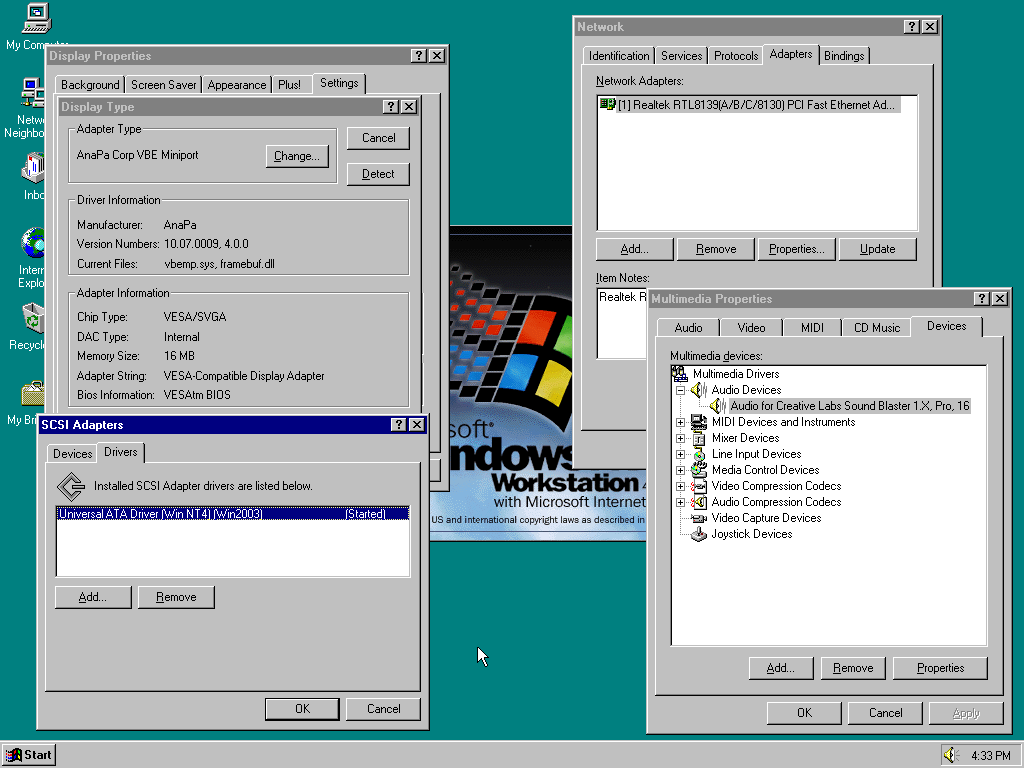
The UniATA driver works great and will provide a noticeable improvement in disk I/O performance.
- In Control Panel, open up SCSI Adapters
- On the Drivers tab, click Add…, then Have Disk… and enter the path to the UniATA drivers. If you’re using my floppy image, it’s
A:\uniata - Select Universal ATA Driver (Win NT 4) (Win2003)
- After that’s added, select IDE CD-ROM (ATAPI 1.2)/Dual-channel PCI IDE Controller and then Remove it.
- Reboot and you’ll now be running with fast I/O.
Sound
If you’re using sound:
- Open up Control Panel, Multimedia, and the Devices tab.
- Click Add and then pick Creative Labs Sound Blaster 1.X, Pro, 16.
- On the Configuration screen, set the MPU401 I/O Address to Disable.
Video
Install the right drivers for your card. VMWare SVGA (for vmvga) and
VirtualBox VBE Miniport for (vga) both work well.
I’ve found that vmvga can have some strange rendering issues like the mouse being
too large and screen elements persisting. The VBE driver causes a license to
appear during the blue startup screen, but that’s not a problem.
To install the driver:
- Right-click on the desktop and click Properties
- On the Settings tab, click Display Type…
- Click Change and then Have Disk…
If you’re using my driver disk, now you can enter A:\vga or A:\vmvga depending
on which adapter you’re using.
Note: If you’re using vga, after rebooting your system your display will be set to
a resolution lower than 640x480 which obscures the “OK” button in the Display Properties window.
If you tab through the 3 buttons at the bottom of this window, hit tab once more and then
enter to apply the settings.
Service Pack 6
Once you’re done installing system components and drivers, upgrading to Service Pack 6 is a must.
You can also install the final updates:
- Service Pack 6a
- Post-SP6 update
q299444
Wrapup
If all goes well, you should have a snappy NT 4.0 VM with all the essential hardware working nicely!
For bonus fun, you can add IPv6 support to your system.
libvirt XML Sample
The stock/default config for things like SPICE and USB controllers has been removed from this to focus on the parts that matter.
<domain type="kvm">
  <metadata>
    <libosinfo:libosinfo xmlns:libosinfo="http://libosinfo.org/xmlns/libvirt/domain/1.0">
      <libosinfo:os id="http://microsoft.com/winnt/4.0"/>
    </libosinfo:libosinfo>
  </metadata>

  <memory>131072</memory>
  <currentMemory>131072</currentMemory>

  <!-- NT may BSOD if you change this to multi-processor. -->
  <vcpu>1</vcpu>

  <os>
    <type arch="x86_64" machine="pc-i440fx-10.0">hvm</type>
  </os>

  <!-- NT doesn't support ACPI, so you can remove the `<acpi>` element entirely -->
  <features>
    <apic/>
    <vmport state="off"/>
  </features>

  <!-- You may encounter BSOD if emulating newer processors -->
  <cpu mode="custom" match="exact">
    <model>pentium</model>
  </cpu>

  <devices>
    <emulator>/usr/bin/qemu-system-x86_64</emulator>

    <!-- Make sure to set "writethrough" for the cache -->
    <disk type="file" device="disk">
      <driver name="qemu" type="qcow2" cache="writethrough" discard="unmap"/>
      <source file="/esky/vm/images/nt4ts2.qcow2" index="2"/>
      <backingStore/>
      <target dev="sdb" bus="scsi"/>
      <boot order="1"/>
      <alias name="scsi0-0-1"/>
      <address type="drive" controller="0" bus="0" target="0" unit="1"/>
    </disk>

    <!-- Make sure to set "writethrough" for the cache -->
    <disk type="file" device="cdrom">
      <driver name="qemu" type="raw" cache="writethrough"/>
      <source file="/tank/library/virt/winnt40wks_sp1_en.iso" index="4"/>
      <backingStore/>
      <target dev="sda" bus="scsi"/>
      <readonly/>
      <boot order="2"/>
      <alias name="scsi0-0-0"/>
      <address type="drive" controller="0" bus="0" target="0" unit="0"/>
    </disk>

    <!-- Required during installation for SCSI drivers -->
    <disk type="file" device="floppy">
      <driver name="qemu" type="raw"/>
      <source file="/tank/library/virt/qemu-nt4.img"/>
      <target dev="fda" bus="fdc"/>
      <readonly/>
    </disk>

    <!-- You can also use `pcnet` for 10 Mbit -->
    <interface>
      <model type="rtl8139"/>
    </interface>

    <!-- Must be on the ISA bus to work -->
    <sound model="sb16">
      <alias name="sound0"/>
      <address type="isa" iobase="0x220" irq="0x7"/>
    </sound>

    <!-- Can also use `vmvga` with the VMWare drivers -->
    <video>
      <model type="vga"/>
    </video>

    <!-- The SCSI must be `lsilogic`, which is the default -->
    <controller type="scsi" index="0" model="lsilogic">
      <address type="pci" domain="0x0000" bus="0x00" slot="0x05" function="0x0"/>
    </controller>
  </devices>
</domain>